Long-Overdue Update and Major Announcements
Well, like the title says, this update has been long overdue. A lot has been going on over the past few months, some of which has had a direct impact on the construction schedule for the CM. For example, there was a period of time during which the project partner Home Depot was closed due to the pandemic, so I was unable to get materials. But without going into further details, I’ll just say that things have not progressed at the speed I would have liked. BUT, they have progressed. This is a quick update to showcase some of that progress as well as to make a couple of big announcements. For those following the actual construction, I have taken over 200 photos since the last update, and will be back-filling articles with them so that the construction timeline is preserved.
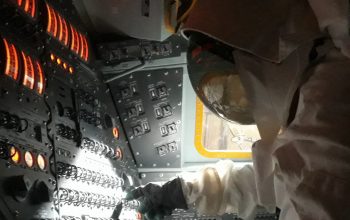
Some of the last posts before the break presented the progress on the Lower Equipment Bay (LEB) half of the CM, in particular the navigation station. Since then, I have completed much of the power distribution, wiring, and electronics installation for the bay half, as well as completing one of the two overhead (over-shoulder?) sections. The power distribution in this half was critical, because most of the circuit breakers providing power for the entire CM are in this half. The two halves are connected by a hefty wiring harness with power and circuitry going both directions. An example of this is the circuit breakers for the computer – they’re on Panel 5 in the hatch half, but they get their power from the bay half, and also send power back to the DSKY in the bay half. Speaking of which, the navigation station DSKY is now installed as well, as is the dimmer for the navigation station lighting on Panel 100. Power for these is now live.
(Photo: The Apollo Education Experience Project)
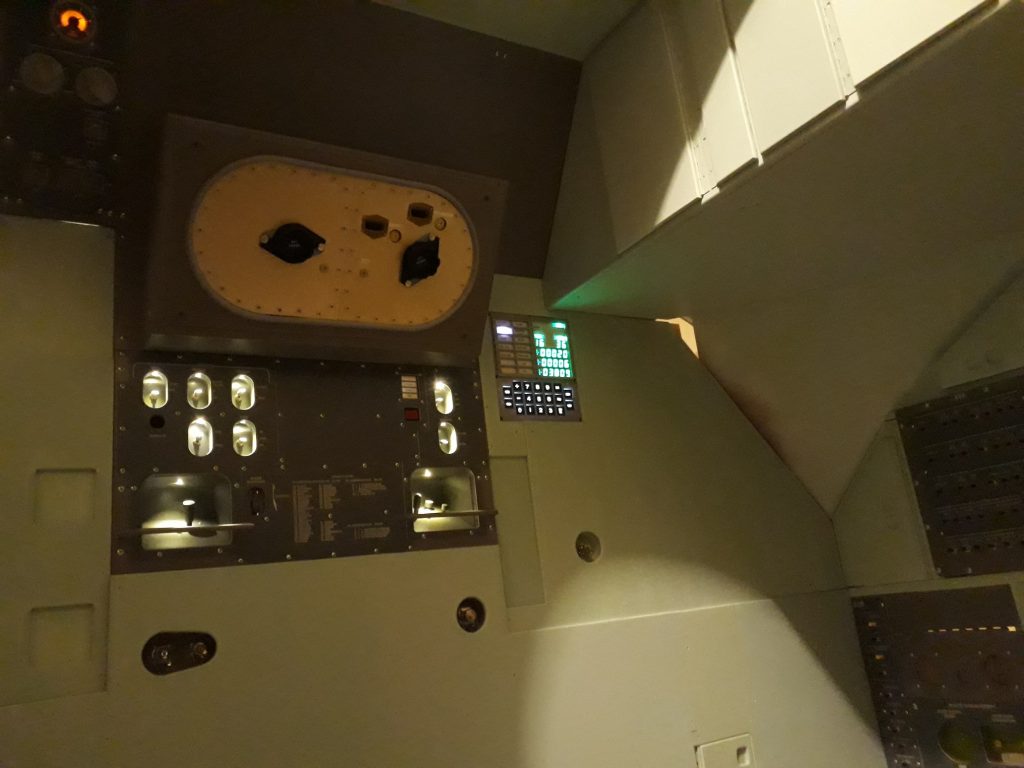
I have occasionally complained about the unusual geometry of various sections of the CM. One of the most difficult sections in this regard were Windows 2 and 4 – the docking windows. Very little about these windows was straight – nearly everything was at an angle, and more often than not compound angles! On top of that, I had to design them in such a way so that I could eventually install LCD displays to simulate the view, most likely to play back a video loop of docking and undocking with the LM. But after many measurements (and trial and error with foam board), I managed to get these completed. Plus, the windows themselves were pretty complicated, having pitch markings on the glass and various pieces attached to them for mounting cameras and COAS devices. Also, now that the walls for these sections were complete, I was able to build and install the wall sconces for lighting the control panel. These are functional units with both a fixed light and a dimmable light, controlled by dimmers on Panels 5 and 8.

(Photo: The Apollo Education Experience Project)
All of the remaining interior walls in the hatch half of the CM are now in place, including the opening for the hatch itself (which I will most likely NOT be building). With the exception of Panels 1, 2, and 3 (the Main Display / Control Panel, or MDC), all of the panels in the hatch half are installed. At this point, I’ve started working on installing the crew couch assembly. This has two major steps – the support structure and the three couches themselves. The support structure consists of two main beams as well as a number of struts, which in the real CM were used to absorb major shocks in the various directions. The beams are complete, as are two of the X struts, the Y struts, and the Z strut. The two remaining X struts fasten between the foot of the beams and the ceiling of the bay half, so they cannot be installed until the two halves are mated. With this amount of the support structure complete, I’ve built, installed, and connected the light fixtures that mount to the structure. Two of the lights mount between the astronauts’ heads for lighting the MDC, and they are controlled by the same dimmers on Panels 5 and 8 as the wall sconces. The other two fixtures mount on the Z struts for lighting the storage area beneath the couches. They are controlled by the dimmer and switches on Panel 100 in the LEB. Two more of these lights will be mounted on the last two X struts for lighting the LEB itself.
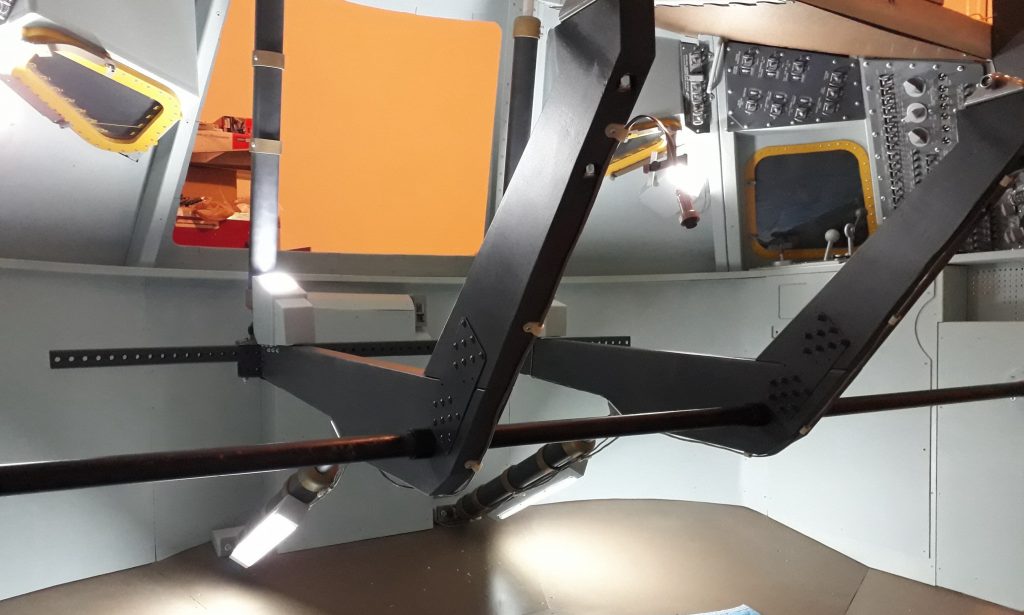
(Photo: The Apollo Education Experience Project)
Now comes the part that I and many other people have been waiting for. Since the crew couch support structure is complete, it’s time to build out and install the MDC. I’ll need to install Panels 1, 2, and 3 while the couches are still out of the CM, simply due to the fact that it is getting VERY cramped in there! As of right now, Panel 2 (the center panel) is about half complete – I’ve installed the Mission Elapsed Timer (MET), the Caution and Warining Lights assemblies, the DSKY, all of the vertical gauges, some of the round gauges, and some other items. I’ve rigged up a 12-volt power supply for testing, and so far everything works. No, the Caution and Warning Lights aren’t supposed to be blue – it’s just that the LEDs they’re built with power up in blue by default, and the code on that DSKY hasn’t been updated with the functions to reset them.
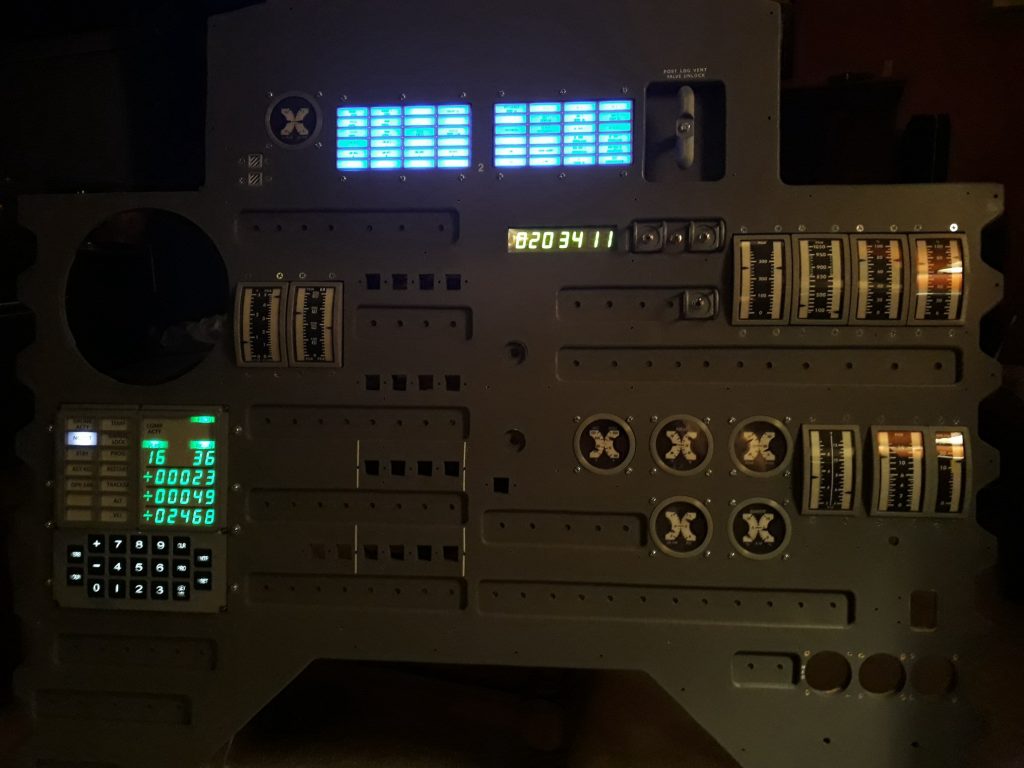
(Photo: The Apollo Education Experience Project)
OK, now for the Big News. The overarching goal of the Project is educating the current generation about the Apollo legacy, but I really didn’t expect this: The Project has been contacted by the Television and Film Department of Mississippi State University, asking if they can shoot some scenes in the CM for an upcoming documentary. Their students are producing the film short “XIII” about the roles that two MSU alumni played in helping the Apollo 13 astronauts get home safely. They will be shooing some scenes in the CM, re-enacting key events during the mission. I’m already preparing the CM for these scenes – sharp-eyed readers may have noticed that the oxygen gauges (the two needles in the left-center unit in the bank of four) are reading very low. Recall the line by EECOM Sy Liebergot (Clint Howard) in the movie “Apollo 13”, “O2 tank 2 not reading at all, tank 1 is at 218 PSI and falling.” The gauges represent these values. The teaser trailer for the MSU production can be viewed here:
(courtesy MSU Television Center)
And if that is not enough, the Project has been contacted by another university about another student film project documenting a different aspect of the Apollo program! I cannot reveal details yet, but believe me I will post them here when I can!