
Apollo A7L Space Suit Replica
My daughter has been with me for 6 of the past 8 days, so I haven’t been able to get much work done on the Command Module. However, I have still been working on the Project. She wanted to know what costume I would wear to the Fall Festival, and I thought what better costume for the 50th anniversary of the Apollo missions than an A7L space suit! Plus, that is one of the desired extras, so it still fits with the Project’s goals.
I had already downloaded a number of models for various parts, but they needed some work to make them more correct so I got to work on them. I finished the suit-front connectors first, so I put the 3D printer to work. I printed the tabs separately in gold to go along with the blue and red parts. The water connector isn’t exactly correct, but at least it has the correct number of tabs. And I accidentally made two left outlets instead of one of each. Both of those can be corrected later. For now, though, time was short.
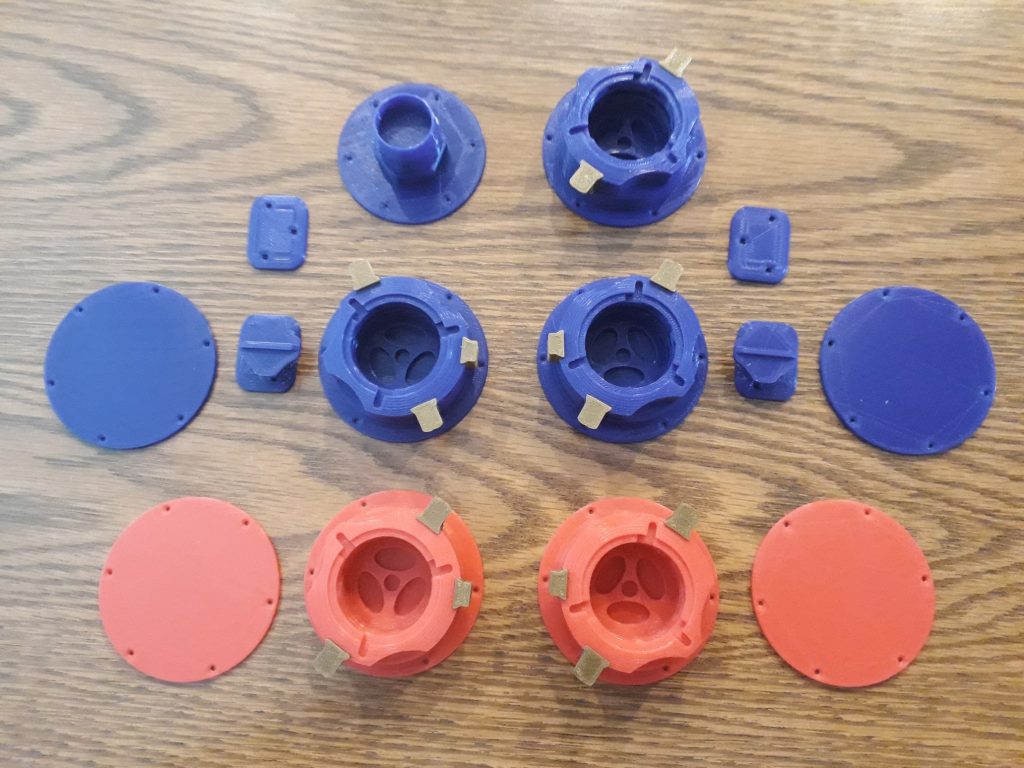
(Photo: The Apollo Education Experience Project)
The wrist connector models needed more work. They started off as just the suit-side connectors, but I redesigned them so that they would accept a glove-side connector (which I also designed, but time prevented me from completing). Both sides have 3/4″ channels for Velcro to make the attachments to the suit material. Like the other connectors, I printed the tabs in gold.
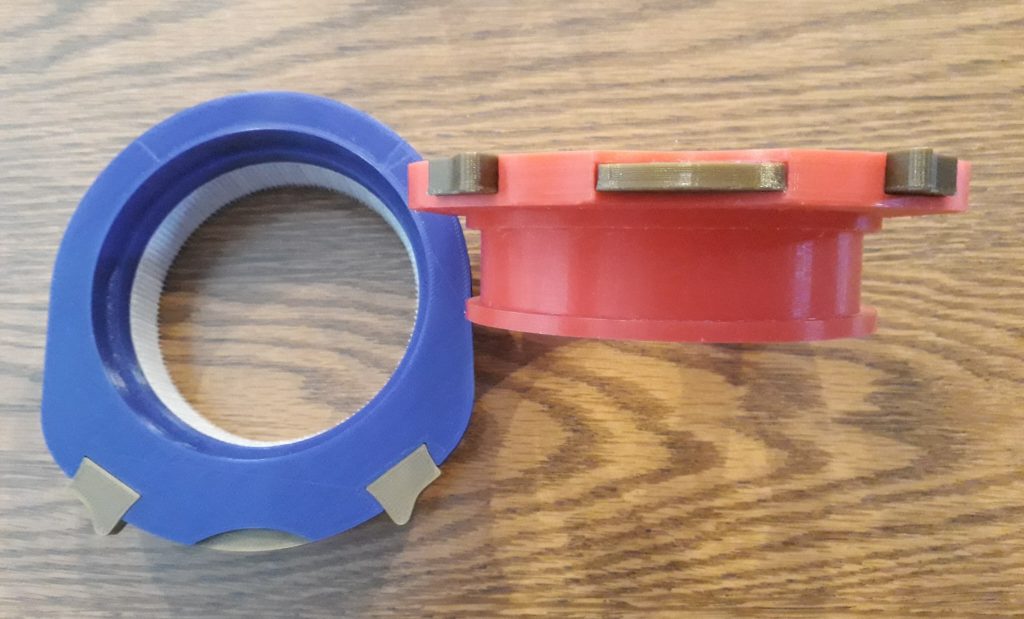
Velcro has already been applied to the inside.
(Photo: The Apollo Education Experience Project)
One significant departure from the real suit is that the zipper will be on the front instead of the back. Because of that, I needed to create a “chestplate” for mounting the connectors and other items that would attach to the front and cover the zipper. I used a base of white duck canvas, attached some interfacing, and covered it with white poly-blend cloth. I made two smaller pieces (without the interfacing) for the top tab and the front pocket, then sewed the pocket in place. As luck would have it, I just happened to have a white cloth belt from years ago with a slip-fit buckle. I bent a D-ring to shape and attached it to the buckle. I then put a piece of black grosgrain around the slip bar of the buckle, then sewed it in place under the top tab.
I positioned the connectors and diverter valves and marked the locations for the screws, then punched holes in the material. I mounted each piece with some #4-40 screws and nuts – the gas connectors with their backing plates and nuts, and the data and water connectors with nuts only. The diverter valves’ backing plates were thicker and didn’t need nuts. Next, I added the snaps. It was at this point I realized a mistake – I had accidentally mirrored the orientation of the chestplate material! Oh , well — that can be corrected in a future version.
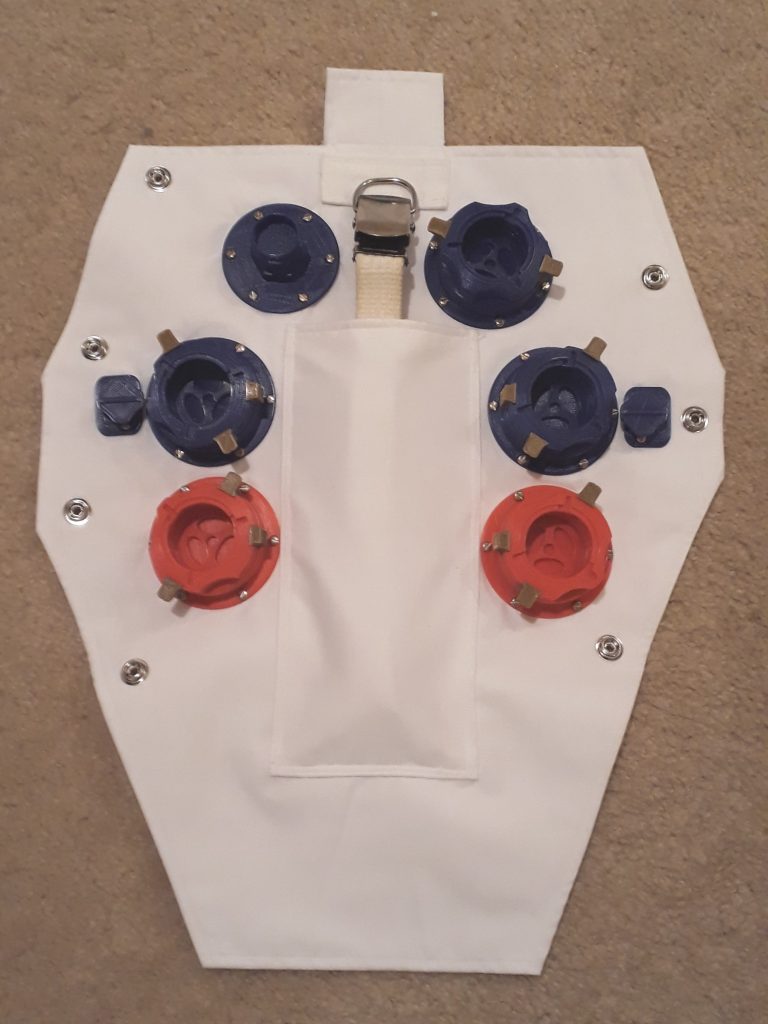
The only thing missing is the Velcro.
(Photo: The Apollo Education Experience Project)
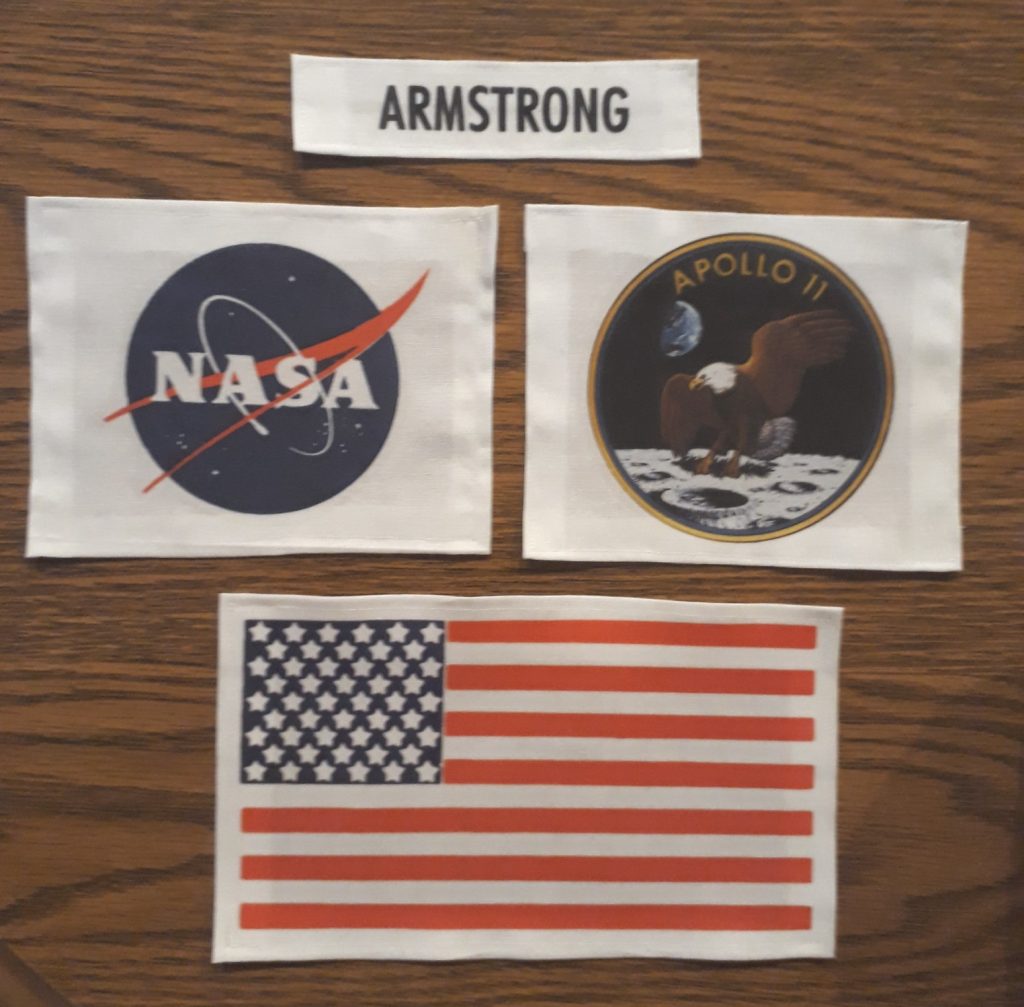
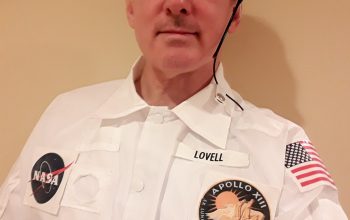
I have some patches I bought while at the U.S. Space and Rocket Center in Huntsville, but since I was there on July 20th (the Apollo 11 landing anniversary), the Apollo 11 patches and others were sold out. So for this version, I chose to make my own. I downloaded some hi-res images of the patches, scaled them appropriately, and printed them onto iron-on transfer paper. I also printed some name patches. These transferred very nicely to some white cotton material (cotton to withstand the high heat needed for the transfer), which I trimmed and hemmed to the correct sizes.
(Photo: The Apollo Education Experience Project)
The suit itself I made from a pair of painter’s coveralls from the Brookwood Home Depot – one XL for the inside and one XXL for the outside. I attached some quilting batting to the inside to give the completed suit some “body” (the real suit was comprised of something like 27 layers – no wonder it was so thick!). I put the inner layer on to measure the sleeves, then cut off the elastic ends, folded them back and hemmed them to the proper length, then attached the other part of the Velcro for the wrist connectors. I had bought a dryer vent hose to use as the convolute for the elbows, but a 4-inch diameter was too small, so I just wrapped the sleeves (and legs) in more batting. I pinned this in place rather than sewing it so I could remove it later if I decide to get some 5-inch or 6-inch convolute.
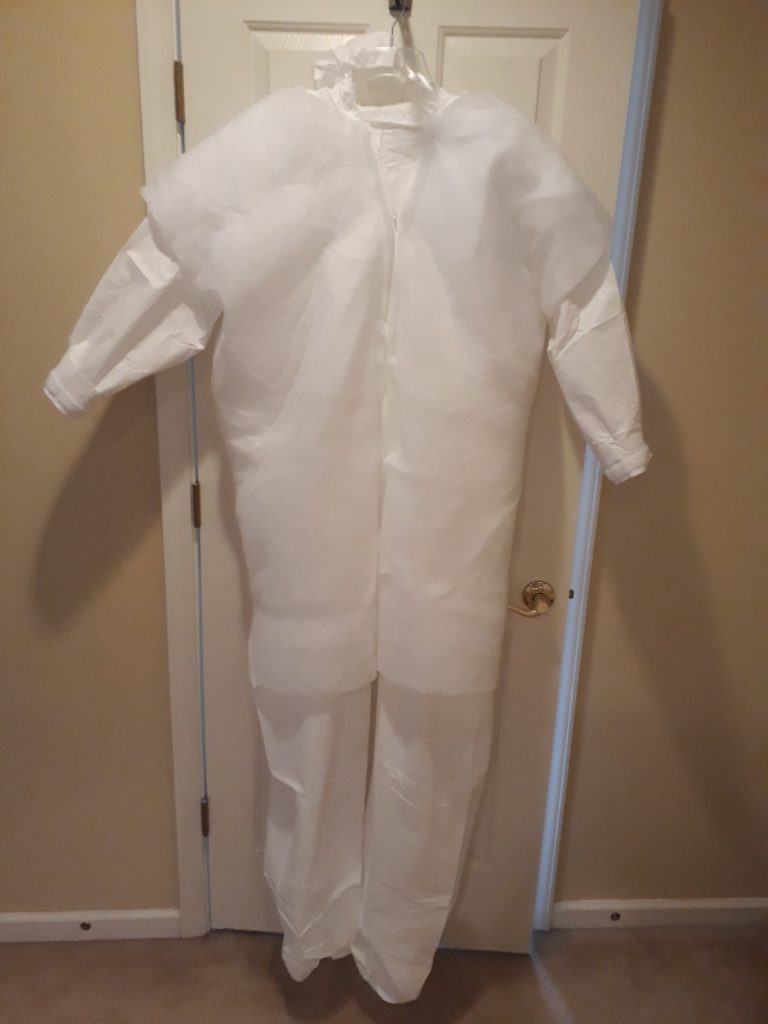
Batting has yet to be added to the sleeves and legs.
(Photo: The Apollo Education Experience Project)
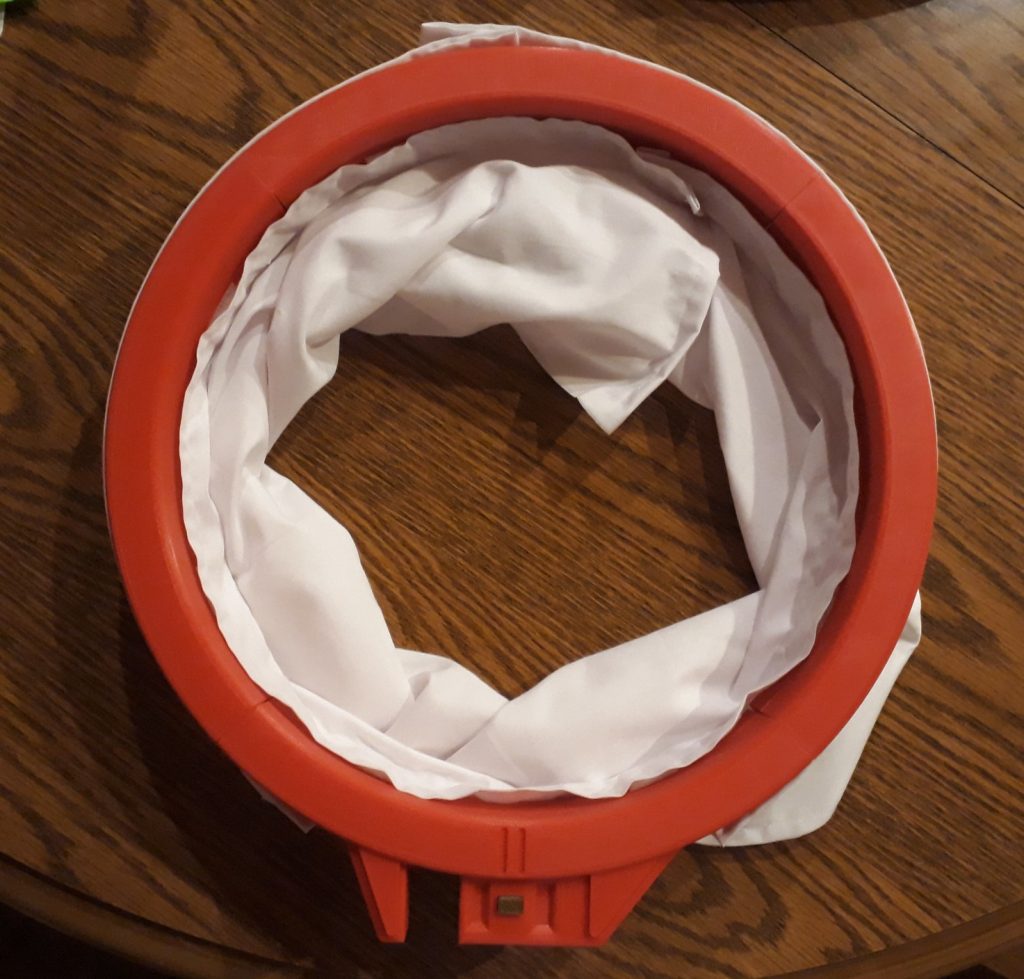
The neck ring presented a problem – it was too big for my printer! So I divided the model into 8 pieces (4 quarters for the top and 4 for the bottom). I modeled pegs and holes at the joints so that they would fit together easily and not depend on glue (in hindsight, I should have modeled either square pegs or two pegs at each end – as it is, the joints can swivel a bit). Once all the parts were complete, I glued the top and bottom of each quarter together and fitted them into a completed ring.
I had planned on attaching the ring to the outer layer of the suit, but I simply ran out of time to try to engineer that. Instead, I simply attached fabric to the inside and outside of the ring. The outer fabric was duck canvas covered with white poly blend, while the inner fabric was just the white poly blend. I attached Velcro tabs to the inside and outside of the bottom ring, then fitted the cloth to the ring, attaching one mating Velcro tab at a time.
(Photo: The Apollo Education Experience Project)
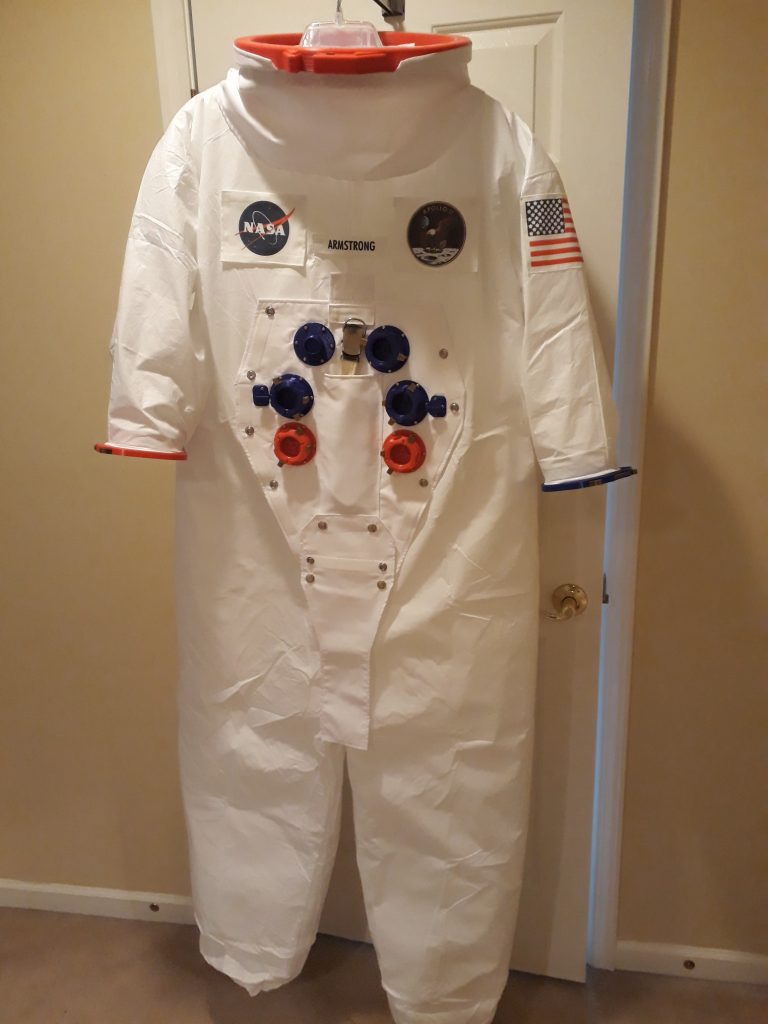
I sewed the flag patch to the shoulder of the outer layer, but decided I wanted to use Velcro for the remaining patches so that they could be changed if desired. I also sewed a rectangle of gray fabric on the back for the PLSS (Personal Life Support System) support area. I put on both the inner and outer layers to get a measurement for the sleeves, then cut and hemmed the sleeves of the outer layer and added Velcro for the wrist connectors. Since I didn’t have real boots and wasn’t modeling the boot connectors, I simulated this by hemming in a flap of fabric around each leg just below the bottom of the leg batting. I positioned the “chestplate” and installed Velcro at strategic locations to provide support for the plate as well as leave clearance for the zipper. I added a final piece of fabric (along with snaps) for what would serve as the zipper cover, and attached it with Velcro to the bottom of the chest plate and to the top inside of the legs.
When I tried on the suit and looked in the mirror, I looked a little less like an astronaut and more like the Stay-Puft Marshmallow Man! I needed to take up a few inches of the outer layer. Cutting the suit at this point wasn’t practical from a time standpoint. The solution not only corrected the problem but simulated another feature of the suit. I applied some Velcro just to the sides of the seam of the outer layer and folded it over. This not only took in the suit, but simulated the zipper cover on the back of the suit.
(Photo: The Apollo Education Experience Project)
There were a number of things I wanted to add, but just simply ran out of time, such as the pockets on the sleeves and legs and the IVA (Intra-Vehicular Activity) gloves (I had already purchased some black PVC-coated gloves for the purpose). Once I actually took my daughter out, these missing items became very apparent – no pocket for my phone/keys/wallet, and the sudden drop in temperature made my hands very cold without gloves! But let me tell you – the number of compliments on the suit was amazing.

(Photo: The Apollo Education Experience Project)
Looking to contact you regarding a project we are working on at Mississippi State University. Can you reach out using my email address?
PM sent. Thanks for your interest!
Hello
I’m contacts in your about your Apollo A7L ‘Moon Suit’ Replica
Replica Deluxe Apollo spacesuit.
Would you be willing to sell just the hardware Of the space suit? The connect around the Helmet That connects to the suit ,and The connectors around the gloves
And the hose connectors on the from of a chest.
Thank you so much
Chris
Hi, Chris – I printed the items for the Apollo suit myself from customized models. I’m not in a position to print enough of these to sell. I am talking with someone about potentially producing and selling a number of items from the Project, but that won’t happen until the Project is complete.
In the meantime, you could look on Thingiverse for models to print. There are a number of them there with varying amounts of detail – I’m sure you could find some to your liking.
Hello
love we’re reproduction spacesuit.
Where did you get the Hardware for your Spacesuit?
thax Chris