
CM Interior Structure – Part 2
I posted an update to the Project’s GoFundMe supporters that I would have the girth shelf completed this past weekend. But as things usually happen, there was a minor delay. However, this was a good delay. Marc Tessier of S&T GeoTronics ( www.stgeotronics.com ) informed me that they had some down time with their laser cutter/engraver, and it was an opportune time to process some of the larger acrylic panel overlays. So much of last weekend was spent preparing cut and etch files to send to them. I’ll post the results in a separate article later when I have the panels in-hand, but I’ve seen some early pics and BOY are they nice!
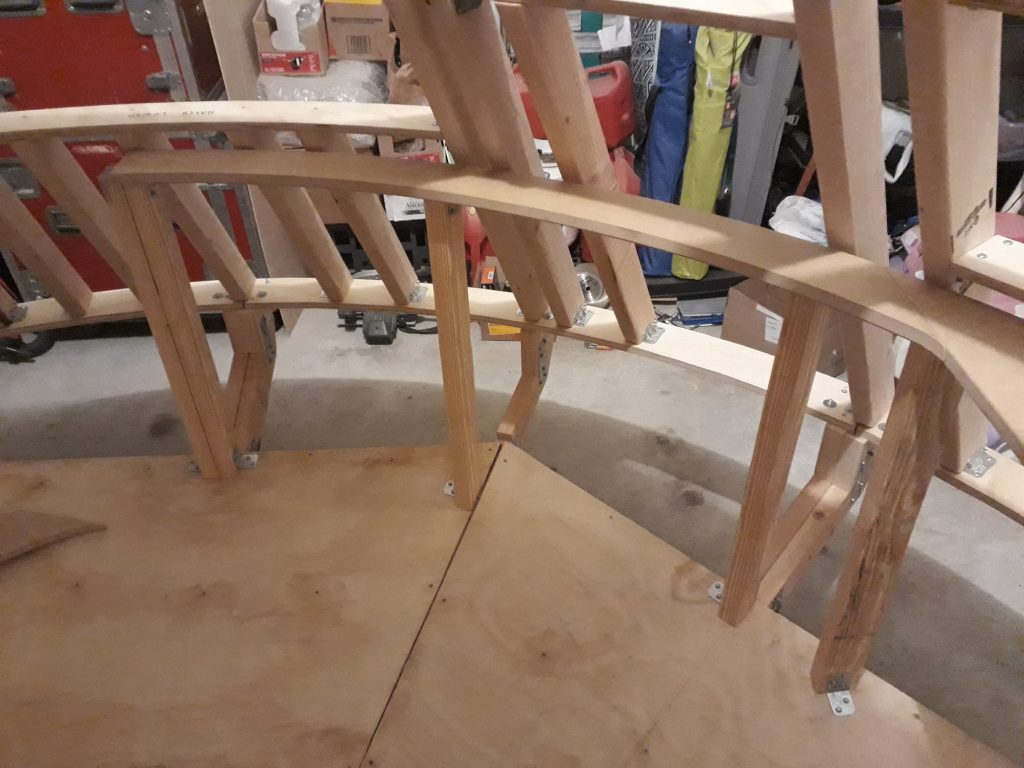
Anyway, back to the girth shelf. The first two of the 3/4″ MDF segments were already in place in the Lower Equipment Bay (LEB) area, so next were the segments for the Right-Hand Equipment Bay (RHEB) and Left-Hand Equipment Bay (LHEB). Unlike the two segments in the LEB, these segments (along with the rest) were cut with a curved bevel to fit against the angled framework. I started by installing the supports for the RHEB shelf, which allowed me to support the shelf and mark locations for some hurricane ties to support the outer edge. With the shelf supported but not attached, I marked the locations for a pair of dowels to align it with the LEB shelf. I installed the dowels, then fastened the shelf to the supports and ties. You may notice that one support doesn’t reach the bottom of the shelf. This is because there will be a recessed panel (Panel 275) just below the shelf in this position. It actually spans the seam between the two halves of the CM, so this is for just one piece – the other piece will be in the other half.
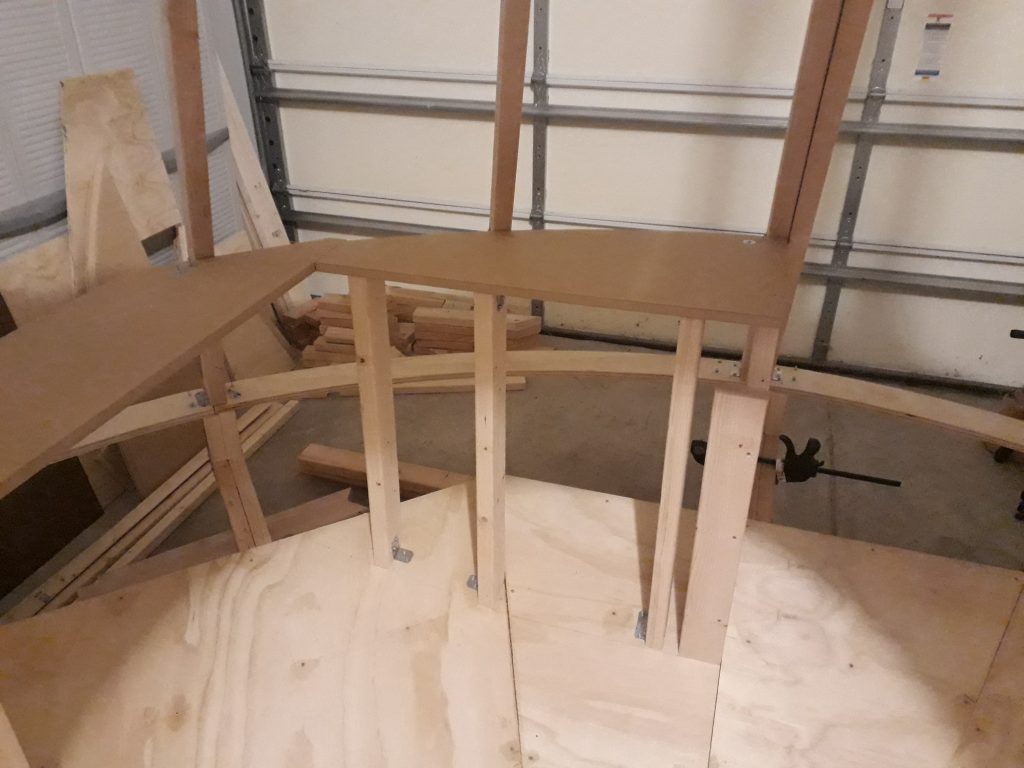
(Photo: The Apollo Education Experience Project)
I repeated the process for the LHEB shelf. The only two differences were that there is no panel beneath the shelf on this side, and one of the hurricane ties needed to be on top of the shelf. This is OK, since it will be inside a cabinet and not visible.
(Photo: The Apollo Education Experience Project)
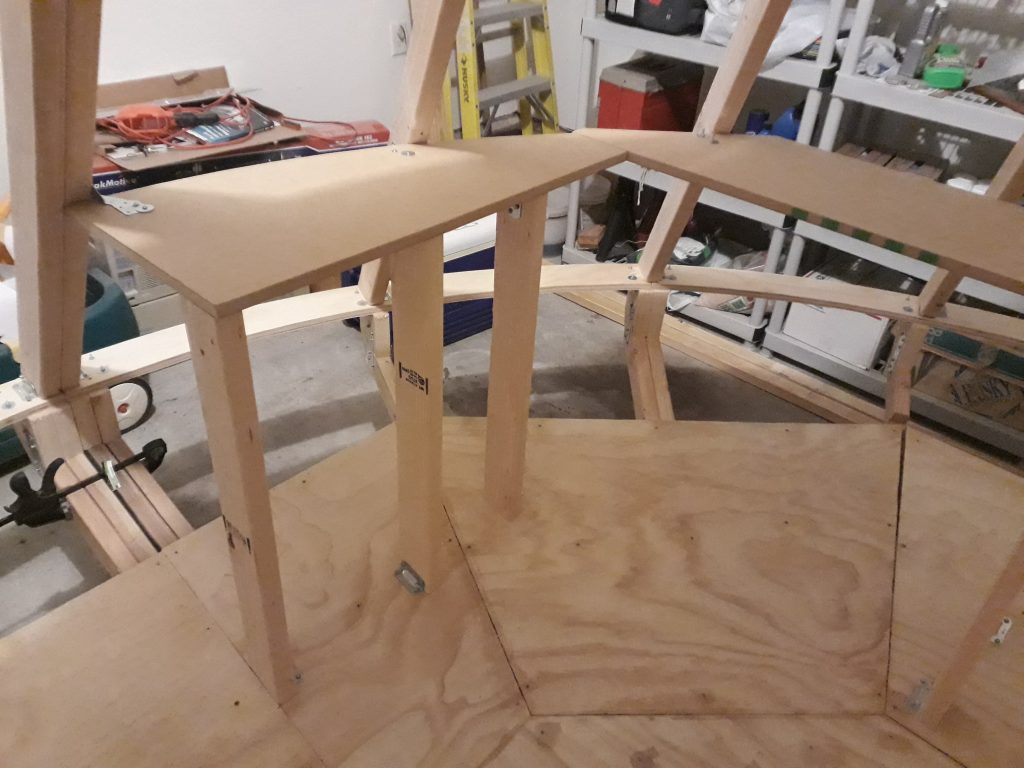
Now that the shelves for the bay half were in, I turned to the hatch half. Before starting, I did a little fine adjustment of the two halves of the CM, since the shelves and their supports needed to align without the benefit of dowels. The left-hand shelf (just to the left of the Commander’s couch location) was first. As before, I installed the supports first, followed by the hurricane ties. This shelf has a small panel beneath it, which I framed in.
(Photo: The Apollo Education Experience Project)
I had to install some extra reinforcement for the supports for this shelf, because once the CM is complete, the Y-axis strut for the crew couches will fasten here. This is a load-bearing location, so I made sure it was extra strong, fastening the adjacent supports to each other and installing a diagonal brace attached with hurricane ties.
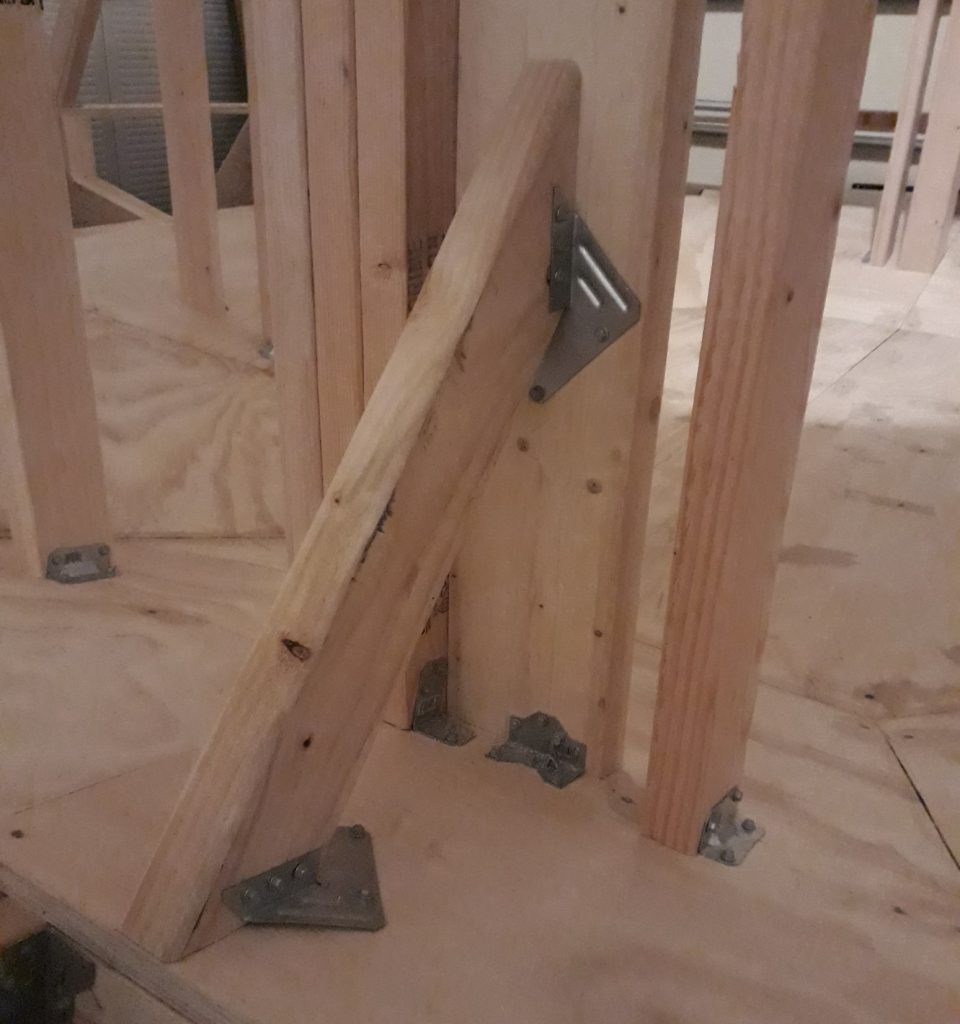
(Photo: The Apollo Education Experience Project)
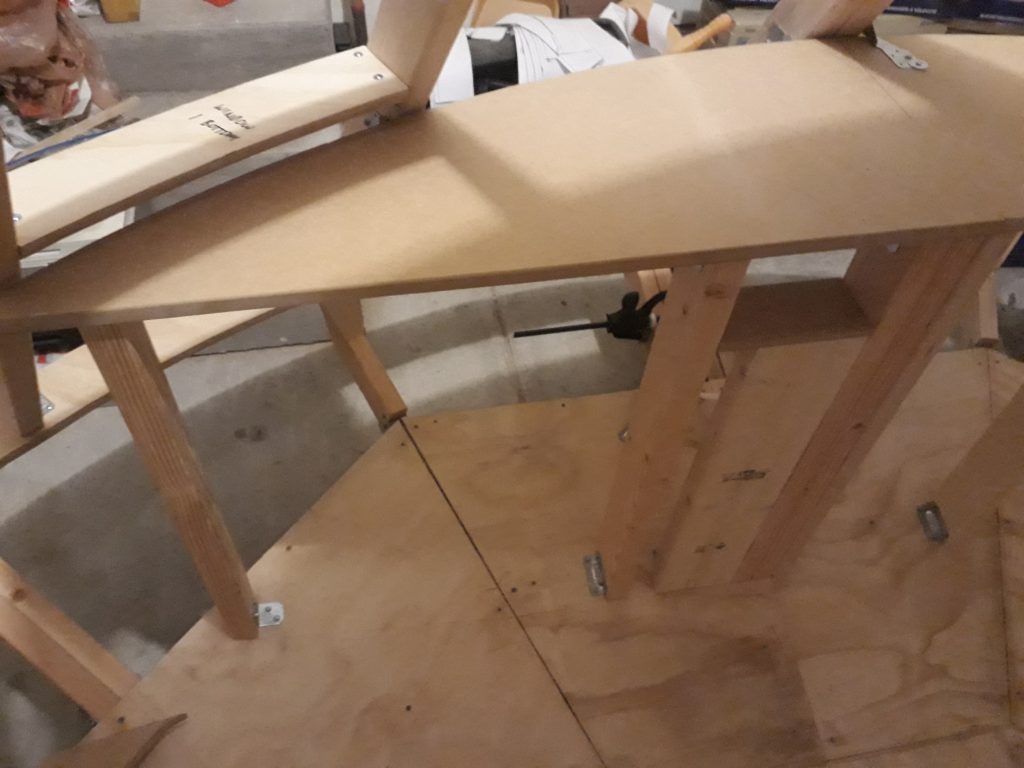
Moving around the circle, I installed the left-upper shelf. The end that connects to the left-hand shelf has a curve and taper that is supposed to be a flush fit, but I apparently did not cut as straight of a line with the jigsaw as I thought. I hit it again with the jigsaw, followed by some 100-grit sandpaper, and it fit much better. I installed dowels to connect the two shelves, then attached this shelf to the supports and ties.
(Photo: The Apollo Education Experience Project)
The next two segments I worked on as a pair, since they completed the girth circle and needed to be installed at the same time to ensure a correct fit. I installed the supports for the right-upper shelf first, then marked and installed the hurricane ties, but only placed the shelf in position. Checks both visually and with laser showed the alignment to be great. Next, I installed the supports for the right-hand shelf, including the recess for the other half of Panel 275 plus a portion of the recess for Panels 276, 277, and 278. Plus, part of this section also needed reinforcement, since it will be the attach point for the other end of the Y-axis crew couch strut.
I placed the right-hand shelf in position, and discovered that it was too big. Because of the strange angles, I had a tough time trying to determine exactly what needed to be removed. I figured it was easier to remove more if it still didn’t fit than it would be to add material back if I removed too much, so I went a little at a time, starting with the edge that meets the RHEB shelf. Turns out I got that right the first try, but I needed a few additional passes to get the places where the bevel contacts the outer structure. I also had a similar problem with the curve/taper of the right-upper shelf, but got that corrected easily enough. Both shelves fit great now, so I installed the last of the dowels and mounted the shelves.
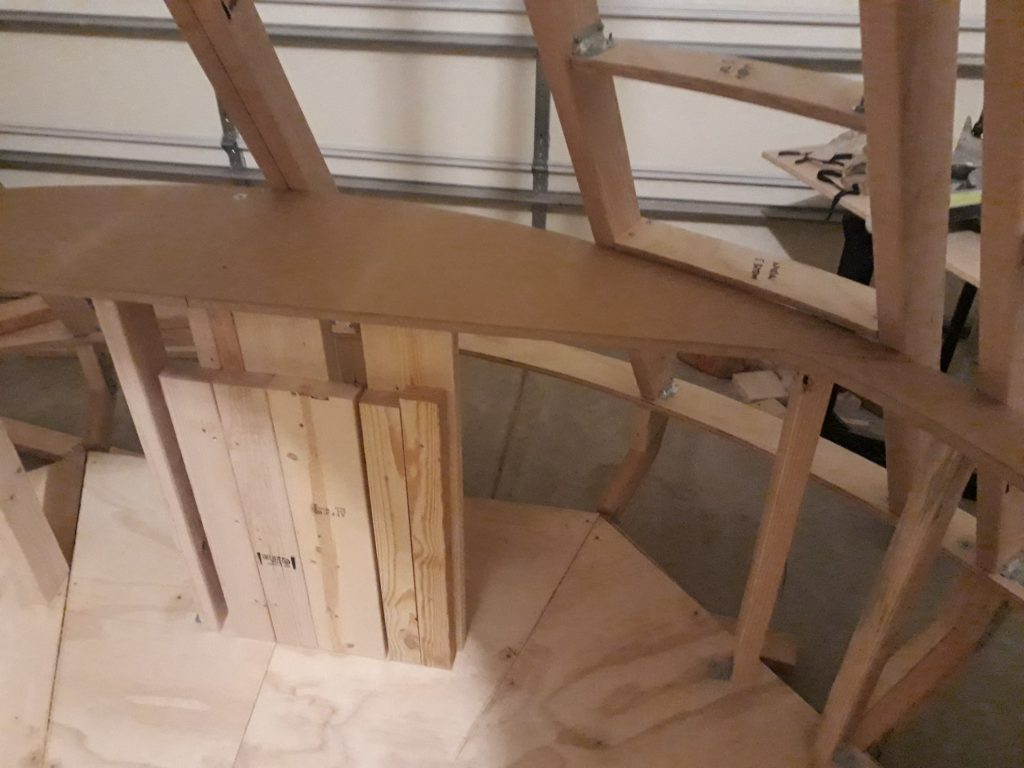
(Photo: The Apollo Education Experience Project)
While that completes the girth shelf itself, I still have a few supports to add here and there. These aren’t necessary for the girth shelf itself, but to provide attach points for wall panels, doors, etc. But I ran out of brackets, so I need to make another trip to the Brookwood Home Depot to restock.
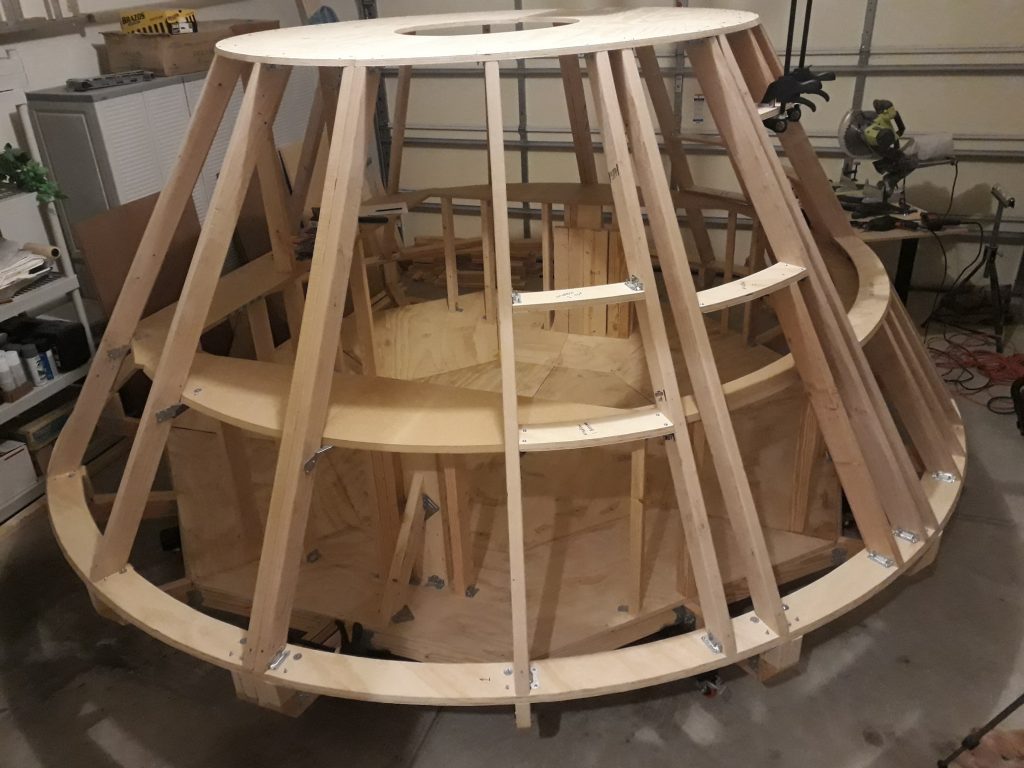
(Photo: The Apollo Education Experience Project)


