
CM Framework Construction – Part 4
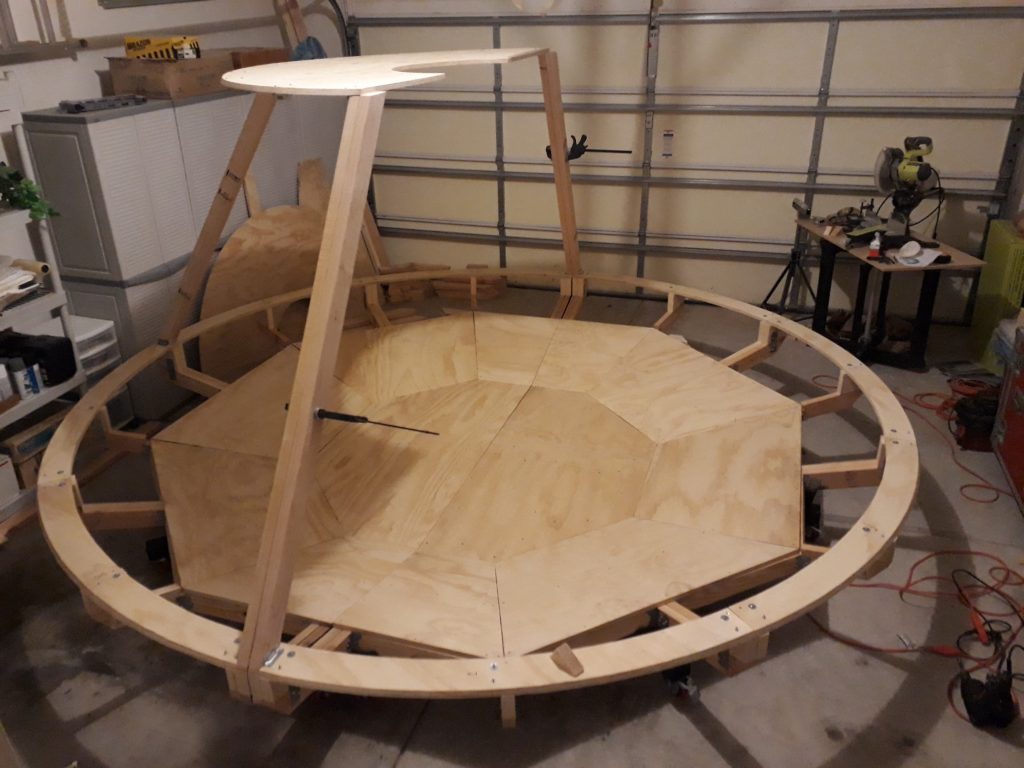
Finally! At long last! I’ve started work on the main part of the CM’s framework – the cone-shaped superstructure. After double-, triple-, and quadruple-checking the geometry, I started marking and cutting the 2×4 boards that would provide both the shape and the support for the structure. The slope of the sides is 58 degrees, which meant I needed to cut the boards at 32 degrees (90 – 58 = 32). In addition to the main supports, I also cut smaller lengths that would support the frames for the hatch opening and windows 2 and 4. I also measured and cut two semicircles of 3/4″ plywood for the top of the crew compartment, with smaller semicircles for the docking tunnel opening.
I started with the equipment bay half (the half opposite from the hatch half – I got tired of calling it the “other half”). I marked the semicircle with the locations of the supports, then mounted brackets to it. I also mounted brackets to the girdle of the base. I did also need to mount brackets on the hatch half for the supports adjacent to the bay half because I needed to clamp the two halves together, not only for alignment but for support. I attached the four supports at the connection line, plus a support at the 90-degree point. Then the “fun” began – I lifted the semicircle with the brackets, and carefully set it on top of the supports. I drilled holes for mounting screws through the bracket holes, then attached the supports. Now the top is self-supporting.
(Photo: The Apollo Education Experience Project)
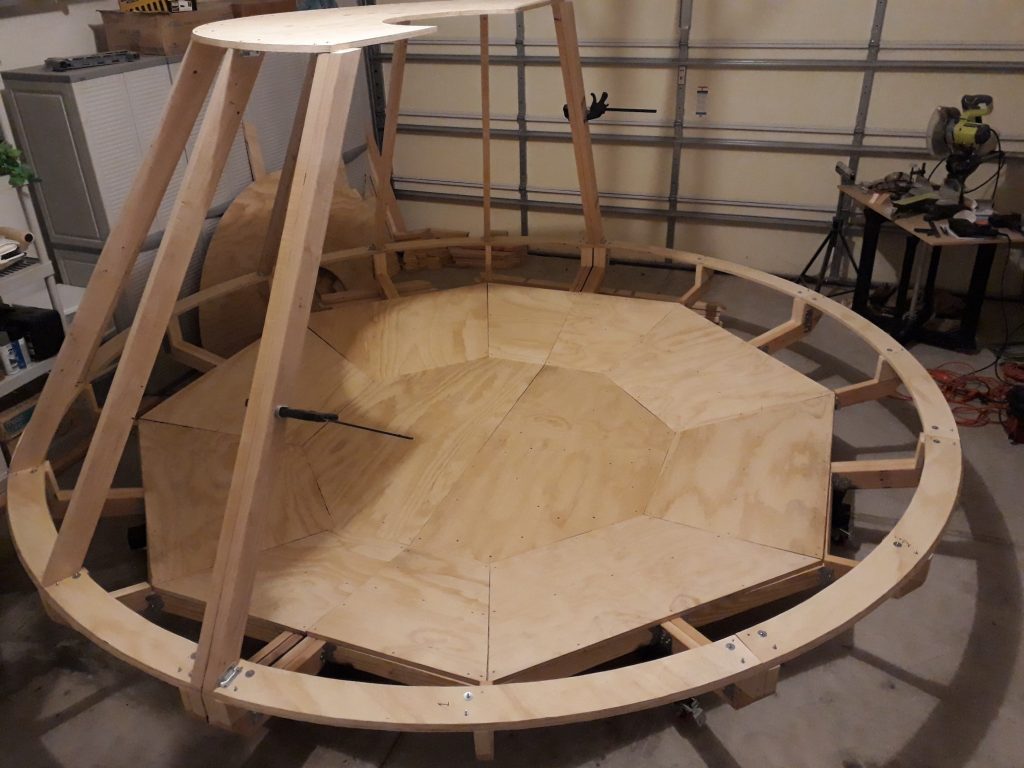
I attached brackets for the remaining supports to the girdle, then attached the supports starting with the 45-degree positions then the remaining spots. After all the supports were in place, I further reinforced both ends of the supports by installing 3.5″ construction screws through them and into the plywood at the bases and through the plywood into the tops.
(Photo: The Apollo Education Experience Project)
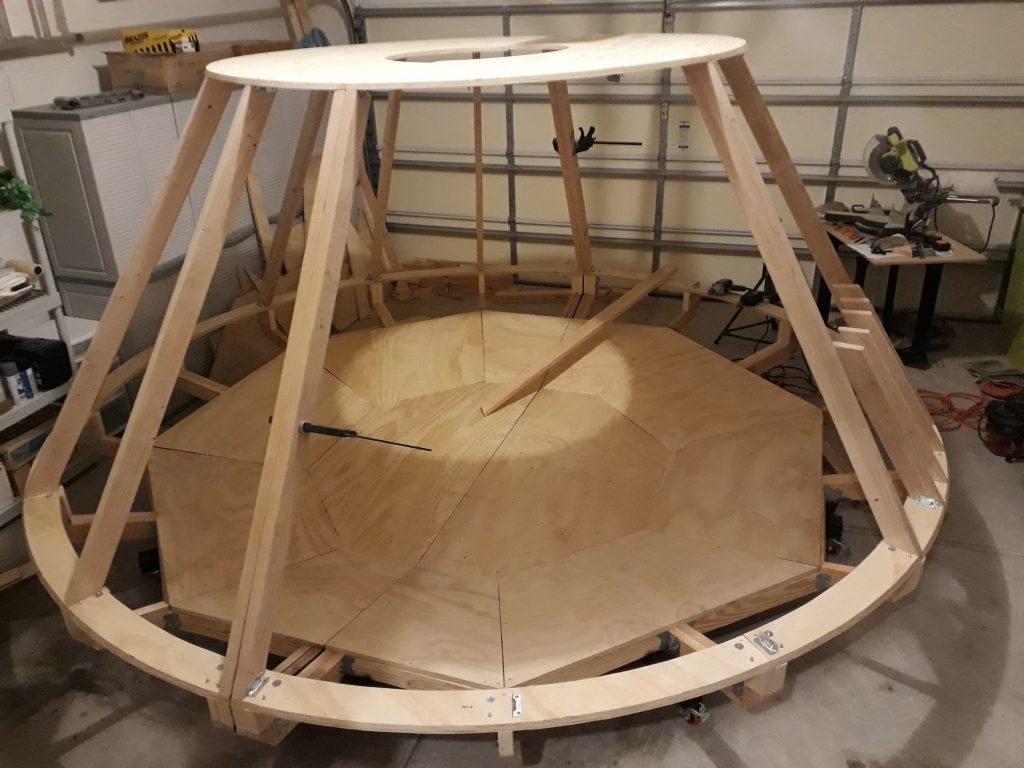
I repeated the process for the hatch half. However, since I could not install a single support at the 90-degree position because of the hatch opening, I installed the supports directly to the sides of the opening. I had considered installing the base of the hatch opening for stability, and had installed the short supports for it when I realized the side supports were sufficient to support the top for installation. I installed the top in a similar fashion as the one for the bay half. During installation, I found that the bay half of the structure was pressing in toward the hatch side a little bit, and it took a bit of effort to attach the supports on the sides of the hatch. But once everything was tightened down it all aligned nicely.
(Photo: The Apollo Education Experience Project)
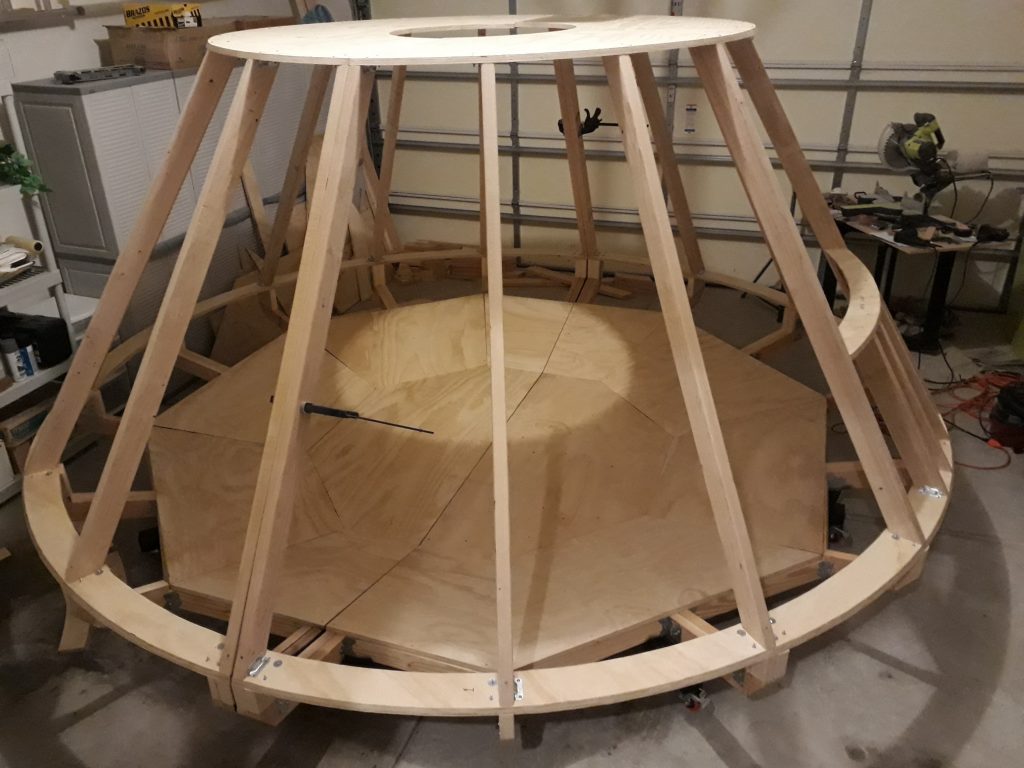
I finished the support portion of the hatch half by installing the remaining supports plus the base of the hatch opening. The hatch base is supported by 6 pieces that are pretty closely spaced, and I had to remove a couple of them in order to install the brackets between the base and the two supports. Once that was done, I reinstalled the supports, then installed some construction screws through the hatch base into the tops of the supports.
(Photo: The Apollo Education Experience Project)
I framed in the windows by adding a few additional long supports, some short supports, and the previously-cut sections of 3/4″ plywood. Windows 1 and 5 had both top and bottom sections, while Windows 2 and 4 had just bottom sections. Those two windows have odd geometry since they allow the astronauts to look forward instead of just out. The rest of their frames will come later. It’s starting to look like a Command Module now!
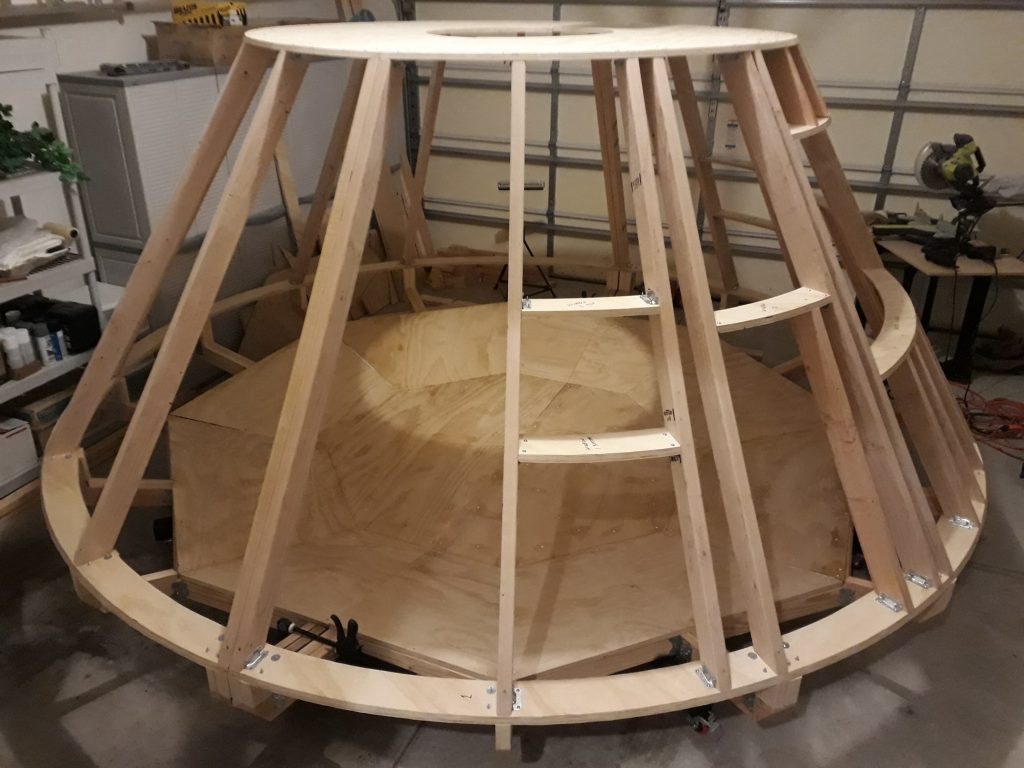
(Photo: The Apollo Education Experience Project)


