
CM Framework Construction
Because of the unusual shape of the Command Module, I needed to start off modeling the structure in 3D before ever cutting a single board. I don’t have a dedicated CAD program, so I’m doing my modeling in Blender. Hey — it’s free and it’s something I already know.
This image represents the two halves of the lower portion, which will separate into the “hatch half” and the “back half”. Not modeled here is the top portion that will include the docking tunnel and other stuff.
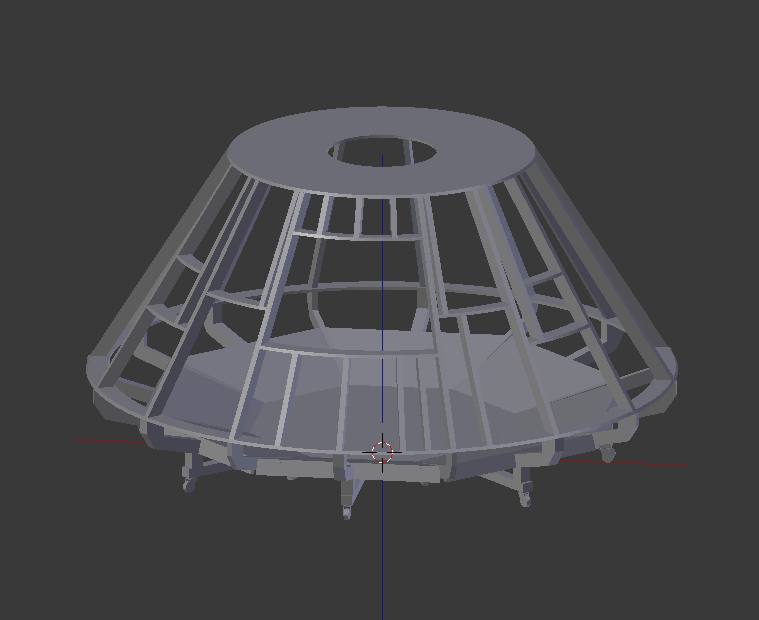
Even though the Command Module’s crew area was puny, the CM itself was fairly large. I found out just *HOW* large while modeling it – the structure shown above is 81″ from floor to top, which will *JUST BARELY* fit thru my garage door! And that’s after changing the structure of the base to use 2×3 boards instead of more standard 2×4 boards. I also reduced the size of the casters from 4″ to 3″, which required adding additional casters to make up for the reduction in load capacity.
The geometry is pretty tricky, what with all the compound angles, so I purchased a new sliding arm laser-guided compound miter saw from the Brookwood Home Depot, who is a partner for this project. The staff there was also very helpful in assisting with the selection of some good 2×3 boards. 2×3 boards are not known for their uniform straightness, so having them help me sort thru the stack to find some good pieces was welcome. I also got some 10-foot-long 2x4s, and cut them down to 2×3 with my table saw since they don’t carry 10-foot 2×3 boards.
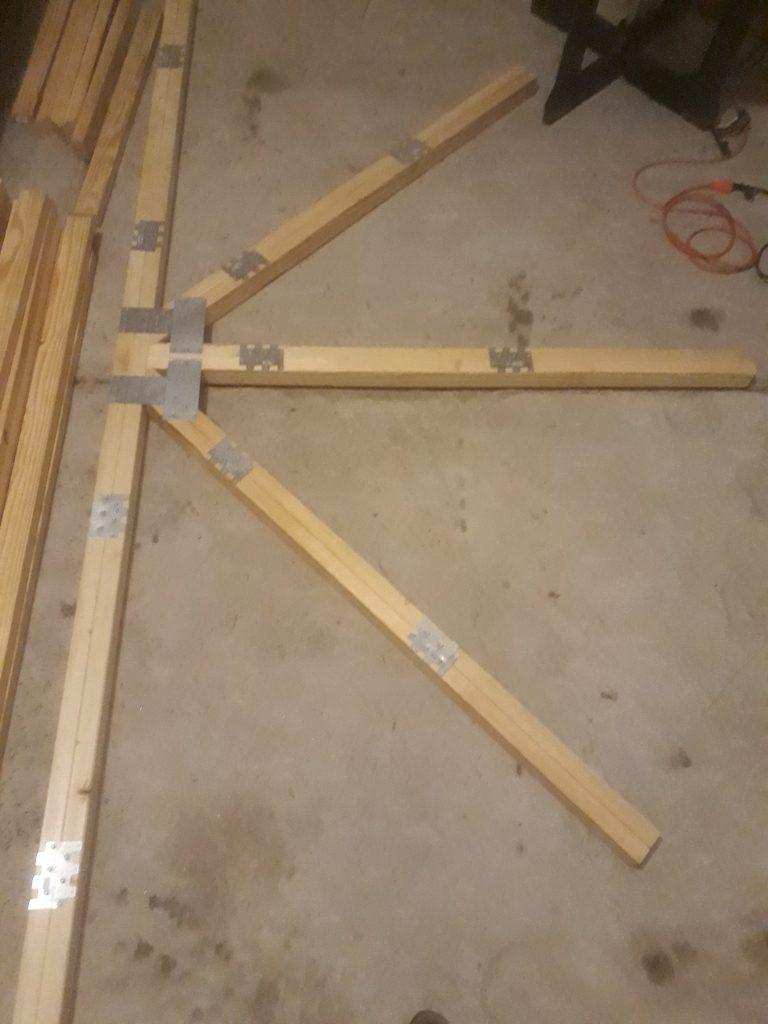
After carefully measuring lengths and angles, I cut the pieces to spec. Because these particular beams are load-bearing, I doubled them up. To help ensure they stay good and straight, I clamped each pair together and fastened them with tie plates and coarse-thread screws. I then fastened the pieces together at the center junction with tie plates. I applied the tie plates only to one side, since the other side will be fastened with the plywood floor of the crew compartment. This is for the “hatch half” – I will eventually need to make a second one just like it for the “back half”.
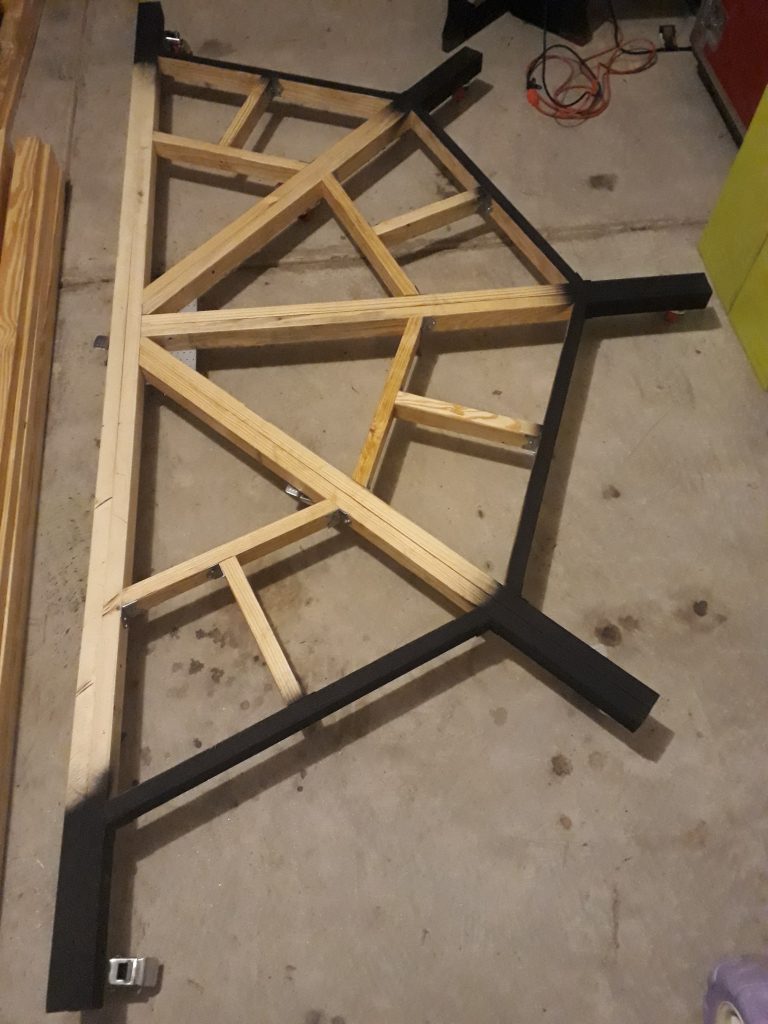
Once I had the first beams in place, I started work on the bracing between them. The inner braces not only provide lateral strength to the base, but will help support the crew compartment floor. The outer braces and the braces between them and the inner braces will support the first of the angled pieces that will be added in later steps. I fastened the braces to the beams and to each other with angle tie brackets and coarse-thread screws. Because some of the screws are close to the ends of the braces which have angled cuts, I drilled pilot holes to help prevent the braces from splitting.
When the bracing was finished, I spray-painted the outer portion flat black. This portion is likely to be visible on the completed structure, so I wanted it to look good, but also to be inconspicuous. Finally, I fastened 8 polyurethane 3″ swivel casters to the base at strategic locations to help evenly distribute the weight. All of them have brakes, but once completed only 5 or 6 can be reached to activate the brakes. Each caster supports a max of 175 pounds, so the set of 8 can support 1400 pounds per half, or 2800 pounds total! I don’t expect the CM to come anywhere *NEAR* that, but when you consider 3 people in the astronaut couches and perhaps one more inside taking photos, the large load capacity will be important.


This is also pretty awesome.
Mine is actually very similar except the base. Might I be able to get the plans from you? I would put them in Inventor so the other things I am building will fit. I would give you the inventor files of course and all the interior panel dimensions. If you want to do it yourself, I could make you a team member and you can access all the other stuff.
You really have a handle on this and it would be nice to pool our resources and get this thing done.
Sam