
CM Interior – Part 3
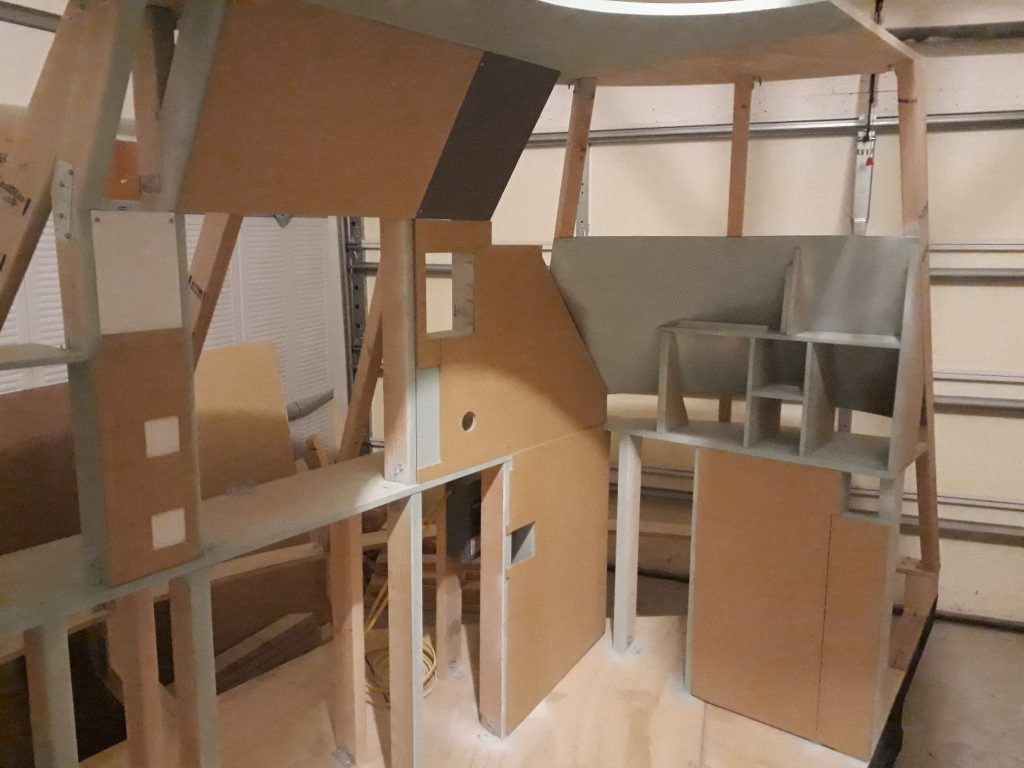
After adding some additional structure, I added some additional cabinet pieces to support other panels or doors. There are a couple more pieces I need to put in, but they will fasten to the outside of the MDF panels I’ll be installing next.
(Photo: The Apollo Education Experience Project)
Before I started installing panels, I thought I’d better paint anything that might be exposed by the gaps between panels. So I wheeled the bay half outside, then primed anything I thought might have a chance of being visible on the assembled CM and painted it “Serenity Blue”.

(Photo: The Apollo Education Experience Project)
OK, time to start cutting and fitting panels! There are two types of “panels” in the CM: control panels which have switches, indicators, and other stuff, and the plain panels that cover stuff up. Unless I’m mistaken, these other panels are called “closeout panels” based on a reference on a cutaway diagram in a Command Module Overview document. So, unless I receive more authoritative data, I’m going to call them “closeout panels.”
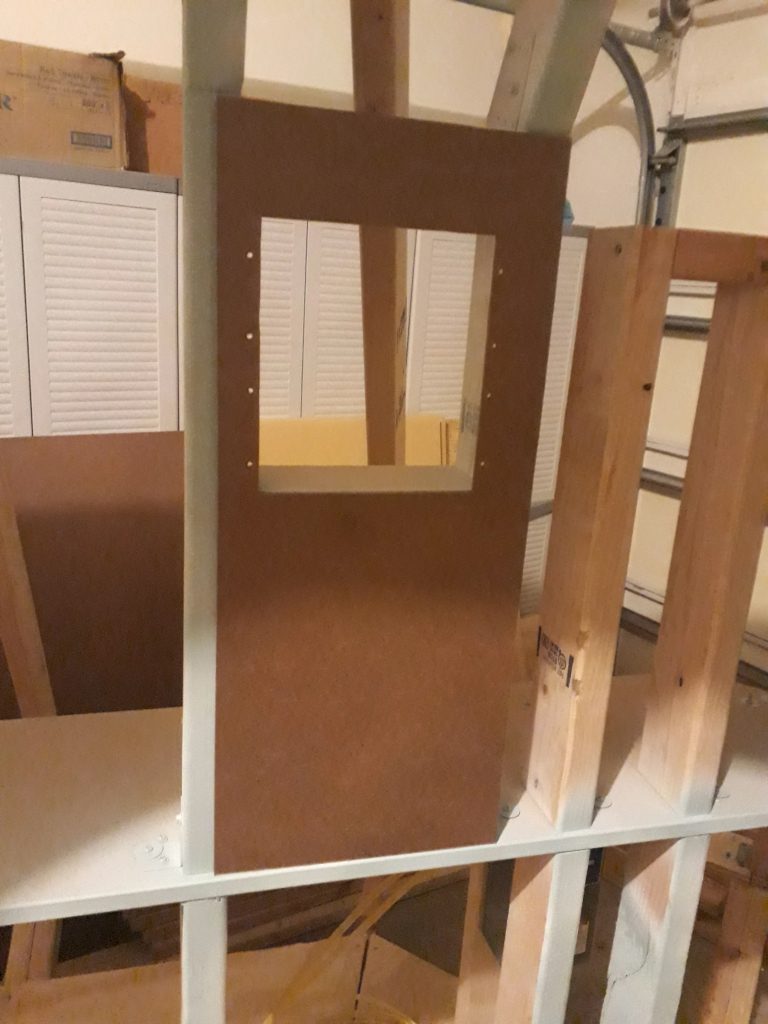
The first panel I cut was for the DSKY and area just to the right of the navigation station. I’ll build this one in several layers for a couple of reasons, including approximating the 3D effect of the original. The first layer is 1/8″ hardboard. I used the big back adapter ring from the Open DSKY to mark the opening and mounting holes for the screws, then cut the opening and drilled and countersunk the holes. I countersunk them here even though they’ll be covered, since the mounts for the real DSKY weren’t visible from the outside. Then I test-fit the panel in its place.
(Photo: The Apollo Education Experience Project)
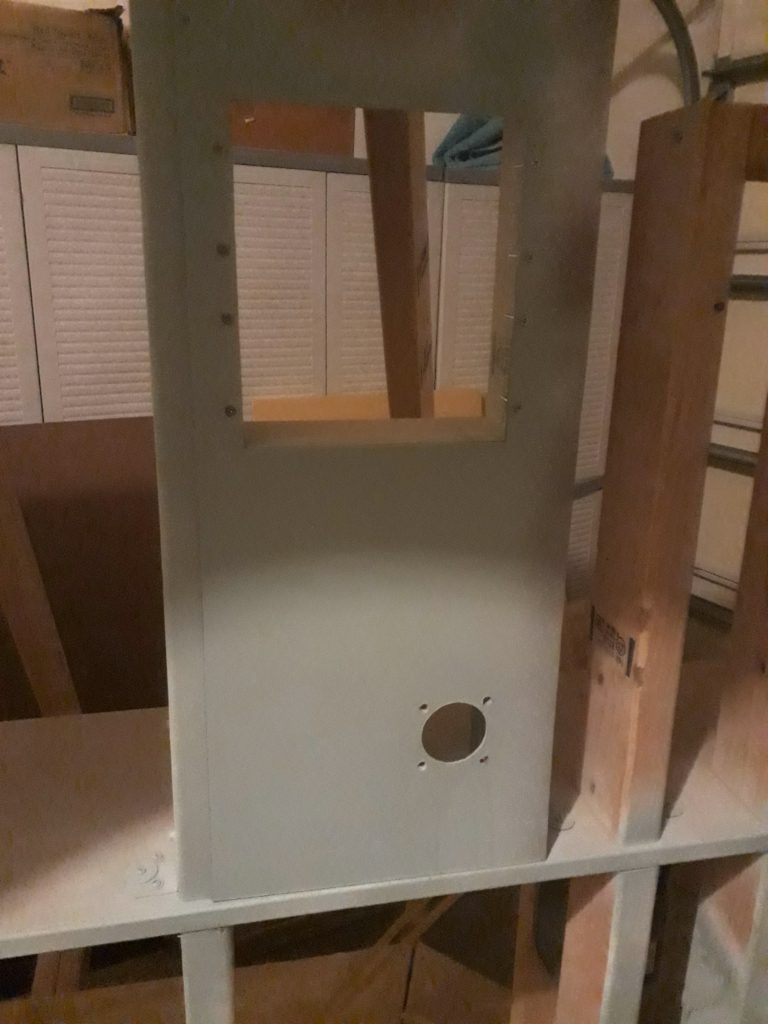
This panel will also hold a connector for the navigation station’s rotational controller, so I drilled a 2″ hole and some screw mounting holes for it. I then primed and painted the panel, or at least the areas that might get exposed on completion. One dry, I installed 8 flat-head screws for mounting the DSKY and fastened them in place with lock washers. Finally, I mounted the panel in place.
(Photo: The Apollo Education Experience Project)
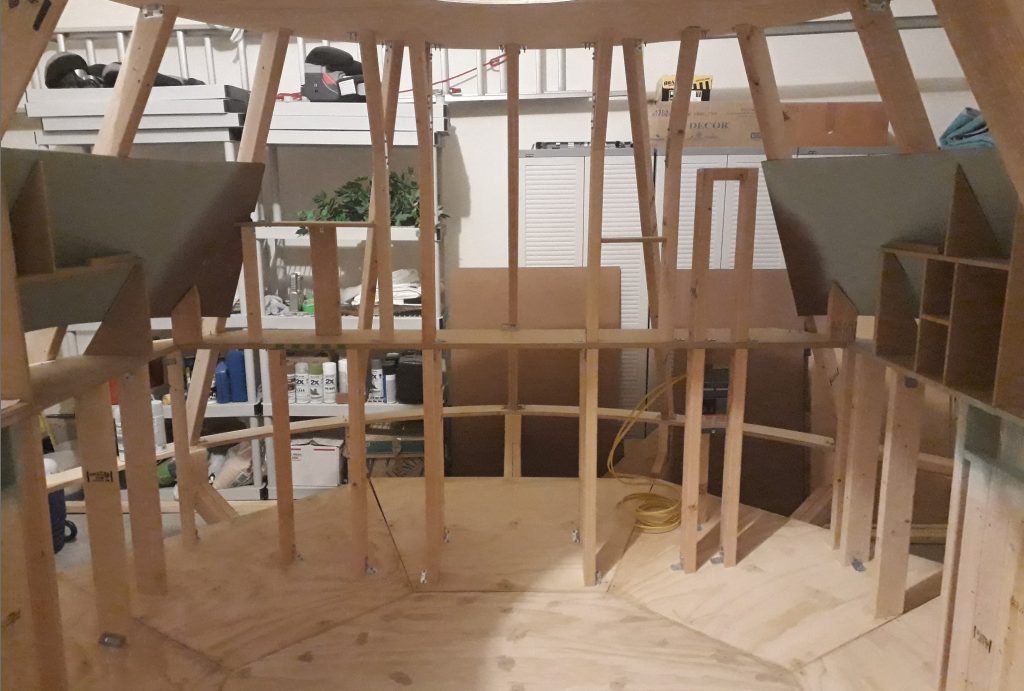
Next, I ventured below the girth shelf and started cutting panels for several areas from 1/4″ MDF. I started with the closeout panels for the Left-Hand Equipment Bay (LHEB). While I was over here, I did cut a smaller closeout panel for the top of the LHEB. I primed and painted it in place after mounting, but quickly learned that wasn’t going to work — too much overspray. So from this point I’ll mount panels for fit but paint them separately.
(Photo: The Apollo Education Experience Project)
Moving to the Right-Hand Equipment Bay (RHEB), I cut panels for the areas beneath the girth shelf from more 1/4″ MDF. I mounted the first two, and even though I had measured pretty carefully, the fit was off. I had to shave about 1/16″ off of one of the edges to get it to fit right. The other two panels I cut as single panels but discovered that they need to be multiple panels, so I’ll cut them before mounting.
Next, I started work on panels for the Lower Equipment Bay (LEB). The first panel I cut was the backing panel just to the left of the navigation station. Like the mounting panel for the DSKY, I cut it from 1/8″ hardboard, which will be overlaid with a 1/4″ MDF panel for a 3D effect. I also cut the top from 1/4″ MDF with angles of 58 degrees to fit against the ceiling above and the other panels beneath. Two of these I painted gray.
The closeout panel that overlays the DSKY was a complicated shape, and required numerous measurements. It would have required more if I chose to model some removable panels, but I decided to forgo that level of detail. I did have to cut a 2″ hole to match the one cut in the hardboard. Again, even though I measured carefully, my cutting tools aren’t that precise, and the hole was about 1/16″ off-center. I enlarged it a bit, and the result is not that noticeable.
Then I cut the first of the closeout panels beneath the girth shelf. One is just a blank panel, but the next one surrounds a small access door. In the real CM, it is for ampules of medications, but in the replica it will be the access to the electrical service breaker box. I mounted the panels I’d cut so far, and like a puzzle they fit together nicely.
(Photo: The Apollo Education Experience Project)
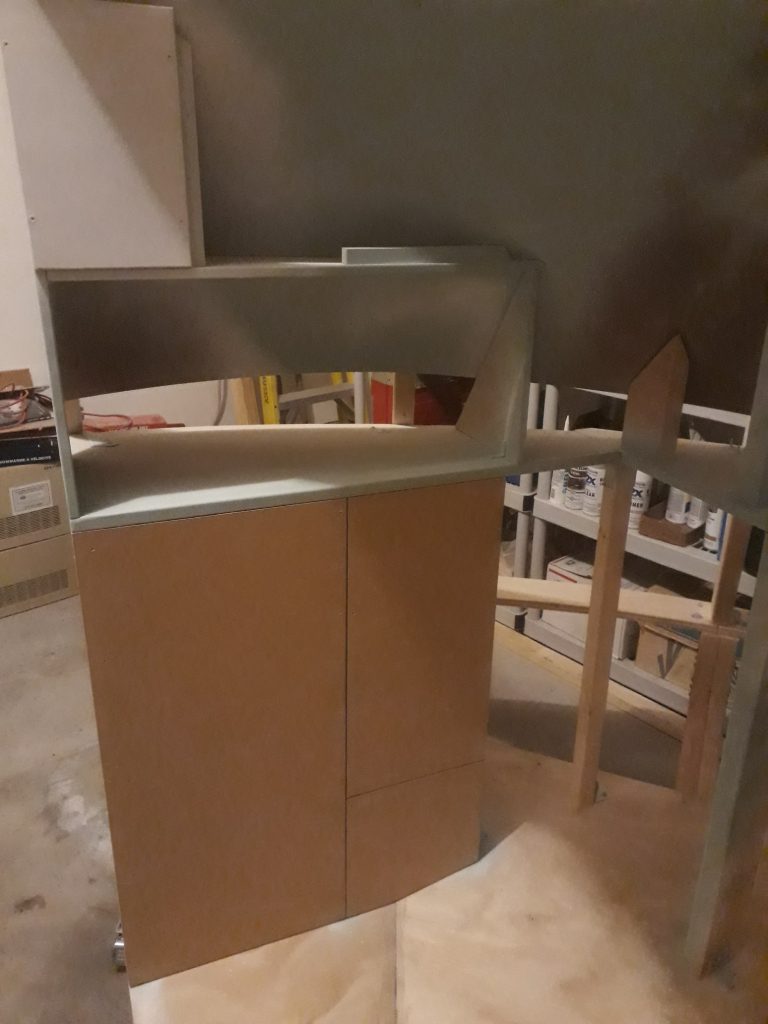
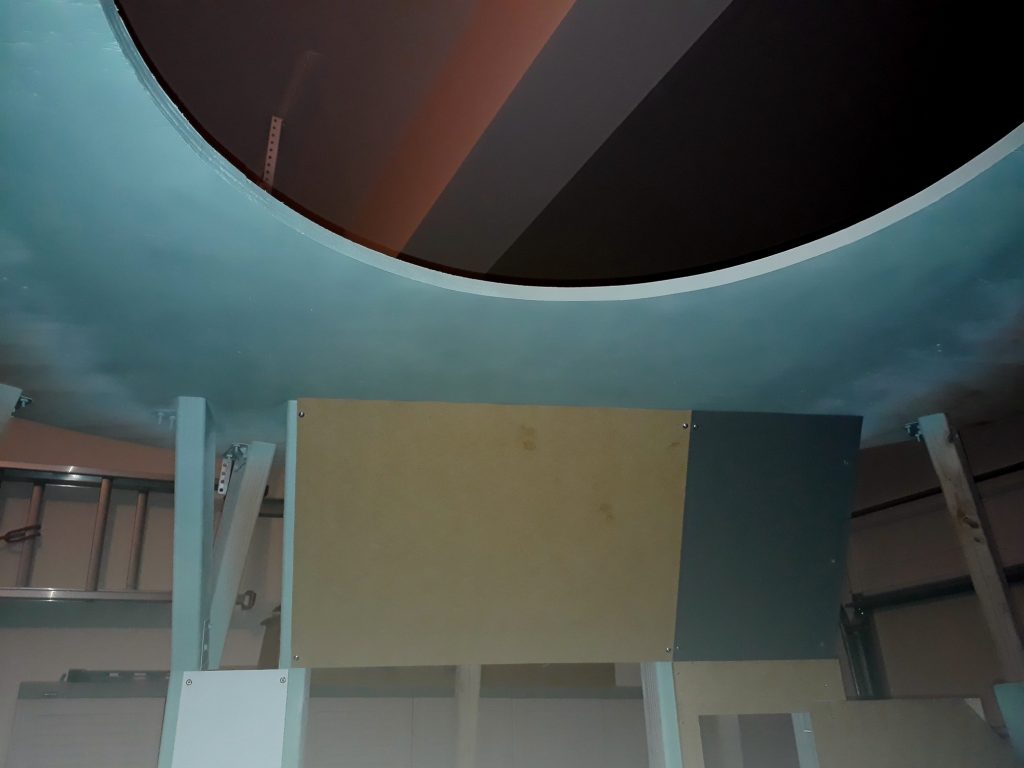
Before mounting the top angled panels, I needed to paint the visible area of the ceiling. But before I could do that, I needed to mark the locations for the upper equipment bay cabinets and drill holes for their brackets, since painting would cover up the marks. This required assembling at least the faces of the two cabinets, their 2″x2″ supports, and the brackets. After fitting, marking and drilling, I primed and painted the exposed area of the ceiling in the lovely “Serenity Blue.”
(Photo: The Apollo Education Experience Project)


Thats an awesome build!
I am building a CM myself and have cracked a lot of these nuts. For example, I have the main control panels ready to cut and my DSKY/AGC is done. I also have a dozen Stratasys printers, 3 cnc mills, a lathe, saw, 2 laser cutters, a drill press, table saw, forklift, overhead crane, etc. This is being built in my machine shop in South Carolina. This is something I do full time as my business provides an income and I dont really have to work there. I am not rich, but I have the time and money to do this.
Do you need some stuff fabricated out of aluminum or in quantity? If you want to provide the materials I could provide the labor and machinery. My intent here is to make a capsule for me but also a capsule segment that you can walk into and sit in a desk chair and play with the panel in front of you and it goes as far back as the heatshield. This way it fits through a 36 inch door if I make it in a couple pieces.
I am going to make and sell these things to museums and space fans. They can afford a capsule segment if they cant afford the whole capsule. This means that some of your work will be used so if you are ok with that, I am ok with some of my work being used by you too.
Other notes:
You can see the DSKY I am making and selling on Ebay, I have made about 30 of them. I also have made an FDAI so there is a nut you wont have to crack. I even have some LEM panels with the guages, meters, and what-not that I am fabricating out of aluminum. I am able to modify the mil-spec switches with the apollo paddle too. The switch guards are going to be made in SC also but I havent decided for sure on my method, the guards you can buy for $9 are a fixed width and early results are that they had early measurements so I might have to make multiple versions.
You can call me too, lets chat about this.
I hope this post is moderated and not automaticly put on the board, I am not advertising here.
My phone is 828-318-4872
Sam Ammons
Telemetrics LLC