
Panel 101
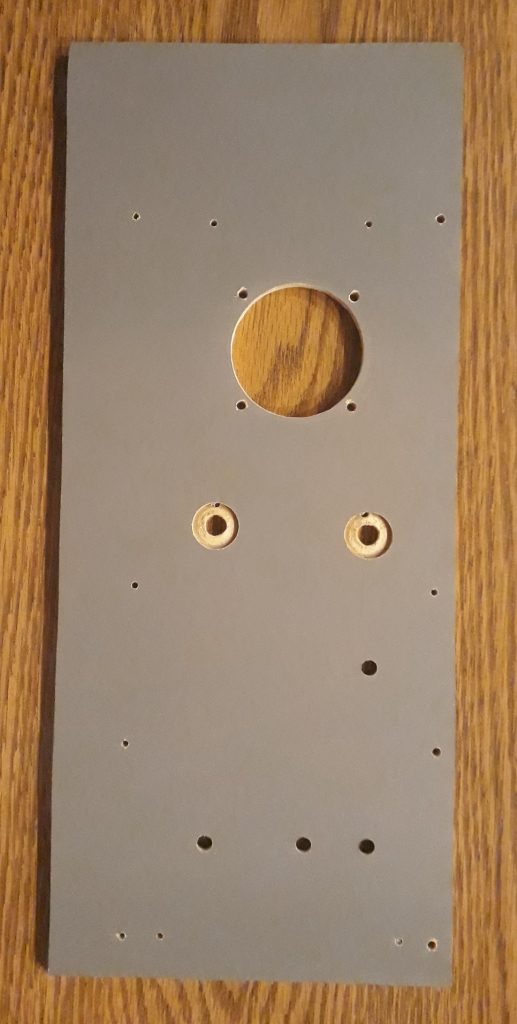
Now that I’m cutting and fitting panels for the upper portion of the Lower Equipment Bay (LEB), I realized that the first completed control panel to be installed in the CM was probably going to be Panel 101. This is the vertical panel just to the left of the sextant/telescope assembly of the navigation station. I cut the panel to size, with beveled top and bottom edges similar to other panels in the navigation station. I transferred the pattern of holes to it, then drilled them out. I then painted the panel in granite gray. Once it was painted, though, I realized something. Since this panel was cut from 1/4″ MDF instead of 1/8″ hardboard, I needed to reduce the thickness for the rotary switches. I did this with a spade drill bit and cut about halfway through. Fortunately, this didn’t mess up the painted surface (most of which would be covered by the acrylic overlay anyway).
(Photo: The Apollo Education Experience Project)
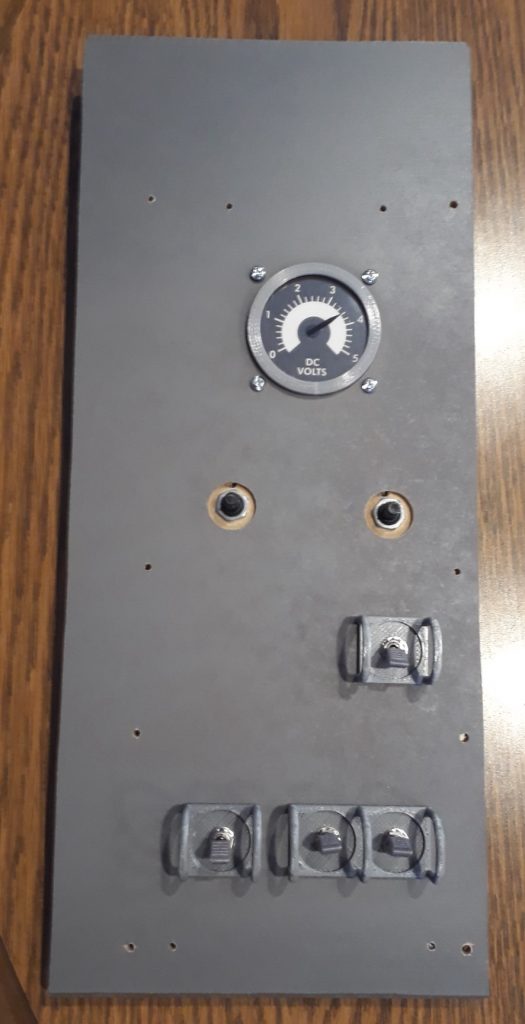
Next, I installed the rotary switches, toggle switches, and gauge (see the earlier article on the gauge). Before installing the rotary switches, I set the number of positions for each switch. The 12-position switches I bought have a great feature – a washer with an index can be installed over the post with the index inserted into a hole in the switch housing to select the number of switch positions it is supposed to have. I set the left switch for 9 positions and the right switch for 4. The toggle switches were installed along with the appropriate toggle guards – two single, one double. The wedge-shaped toggle switch bat extensions went on after that.
(Photo: The Apollo Education Experience Project)
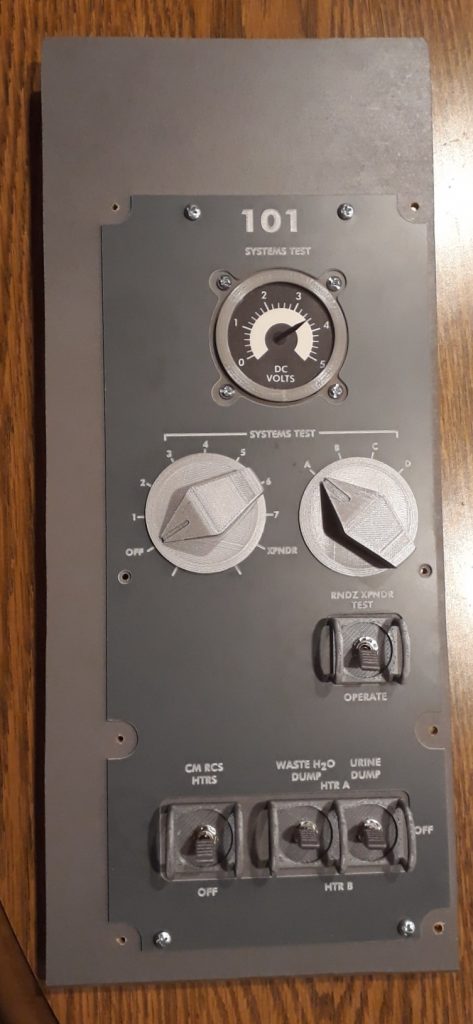
Installation of the acrylic overlay came next. The panel etched and cut by S&T GeoTronics looked beautiful and was a perfect fit. It is supposed to be attached by 6 screws, but I used only 4 for now. The two side screws will be used to help attach the panel to the structure, so I did not install them yet. The final items were the two knobs for the rotary switches, which I attached to the post with #4-40 set screws.
(Photo: The Apollo Education Experience Project)
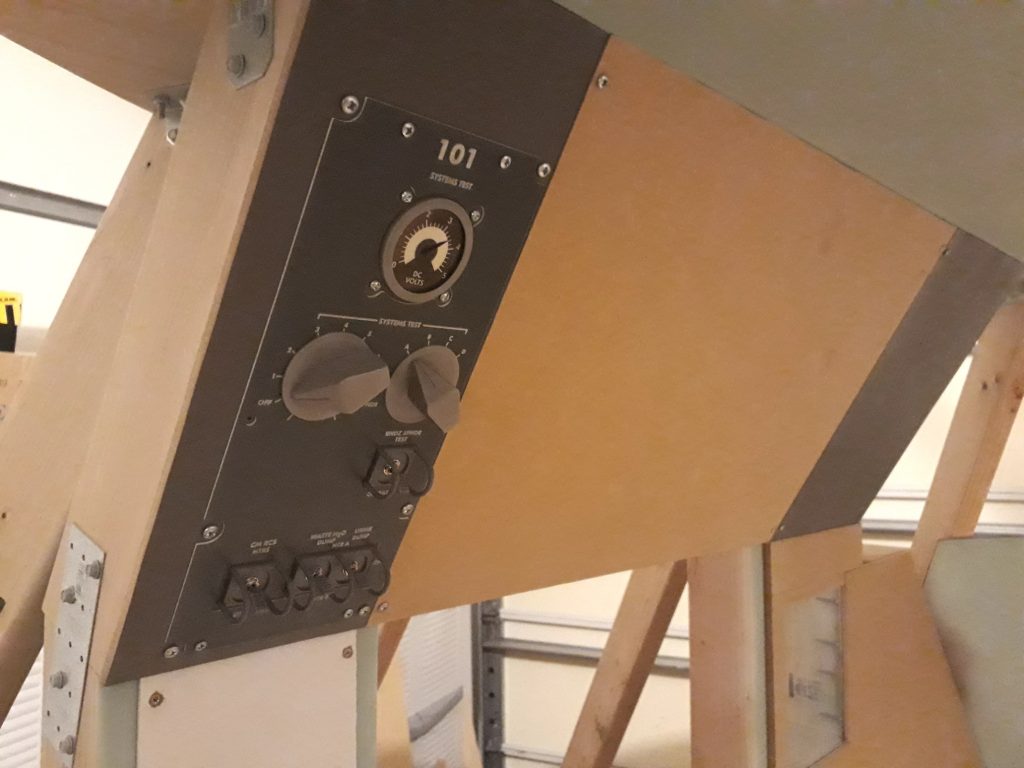
When the panel was complete, I took it outside and installed it in place in the CM. This is just a temporary installation now, since I still need to do a little painting on the bay half, but I wanted to see how things looked so far. I’m liking what I’m seeing!
(Photo: The Apollo Education Experience Project)


I have been working on 3D printed and casted Apollo CM stuff too.