
DSKY – Part 2
This is where I deviated from the regular instructions a bit. Since my DSKY units will be mounted in a panel, they would be powered by the on-board power from the Command Module instead of the AA battery pack. Also, I would have a different speaker setup inside the CM compared with a stand-alone DSKY.
The first mod was to take a 3-terminal piece of the header strip, remove the center terminal, then solder it to the speaker connections on the board. Then similarly, I took a 3-terminal piece of the socket strip, removed the center terminal, then soldered some wire to the two terminals and to the speaker terminals. I could then freely connect and disconnect whichever speaker I wanted.
The power connector is already a screw terminal, so I didn’t need to change the circuit board. However, I do not need the back of the case with the battery pack. Instead, I’m going to attach in its place a piece used to mount the DSKY into a panel.
The kit comes with a piece of clear plastic and a pre-printed panel that are inserted together into the top of the front face. These cover the LEDs and emulate the original EL display of the real DSKY. I assembled the face, inserted the keycaps, then placed the circuit board over the face. Here’s where the engineering of the whole thing shines. The face has all these little light dams to prevent stray light from spoiling the look of the display. They fit so nicely around the 7-segment displays and the GPS and other components. Also, the keycaps are just thin, laser-etched plastic chips that rest on little steps inside the key openings of the face. When the unit is assembled, the tops of the keyswitches fit very snugly against the keycaps and hold them very close to the steps.
The instructions called on fastening the circuit board to the faceplace with “6 tiny copper screws.” I looked, not only in this kit but the as-yet unopened kit package, but there were no screws. I spoke with Marc at S&T Geotronics, and was informed that the case had been redesigned – the assembled case now holds the circuit board in place with pressure tabs and no longer needs screws. Nice!
Once everything was together, I gave the DSKY another round of testing, this time including the audio functions. The DSKY lets you select and play audio clips from the MP3 player using PRO functions instead of VERB-NOUN functions. This allows you to be running a VERB-NOUN function (such as time or the IMU display) and play the clip at the same time without interrupting the display. The photo shows one of the clips running with the IMU display. The kit comes pre-loaded with three clips, but if you can program an Arduino you can add clips and the functions to play them. The clips included are:
PRO 62 ENTR — President Kennedy’s speech “We choose to go to the moon and do the other things…”
PRO 69 ENTR — “Houston, Tranquility Base here. The Eagle has landed.”
PRO 70 ENTR — “Houston, we’ve had a problem.”
This feature will help keep kids’ interest. In fact, after I completed this unit, my daughter could not wait to take her turn playing the clips. Her favorite of course was “The Eagle has landed.” Kid-tested and it passed!
(Photo: Apollo Education Experience Project)
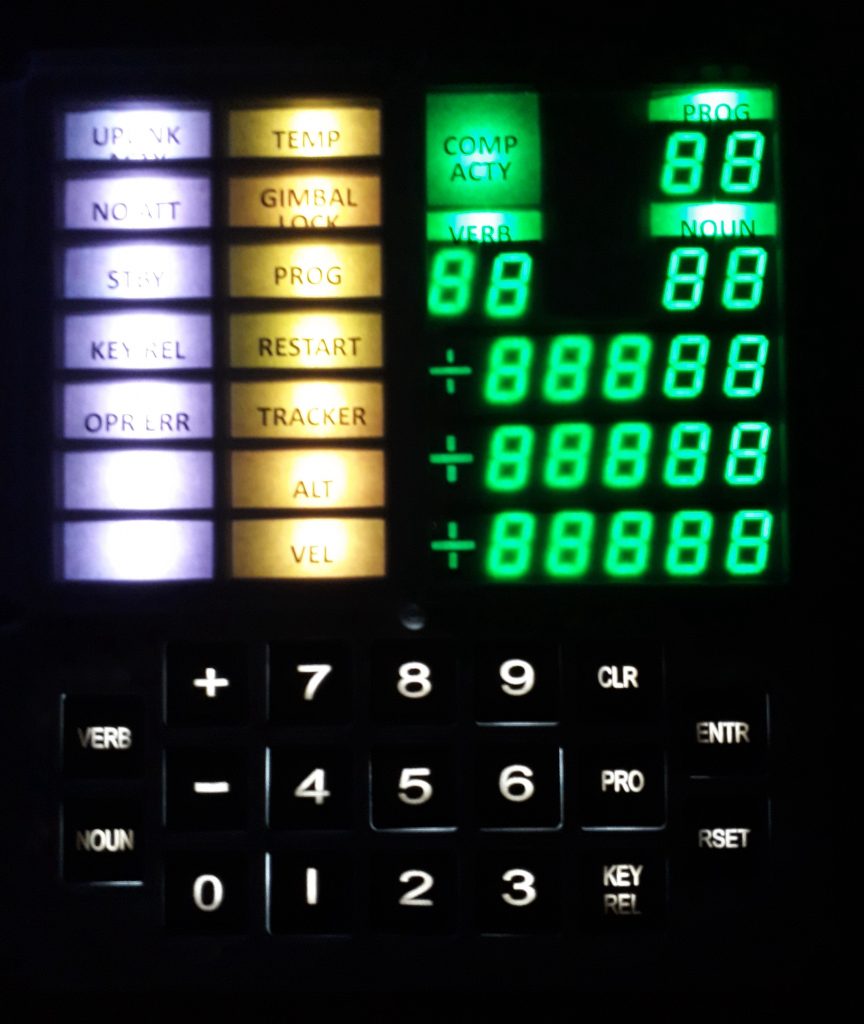
The current function set of the DSKY doesn’t make use of all of the lights on the left side of the display. However, because the Arduino is programmable, they can be used if you so choose. But I’m not to that point yet, so I just wanted to see what the lights look like with the unit assembled and the lettering over the lights. And to really see what they look like, I turned off the lights in the room.
VERB 35 ENTR, and everything lights up just as nice as you wish!
(Photo: Apollo Education Experience Project)
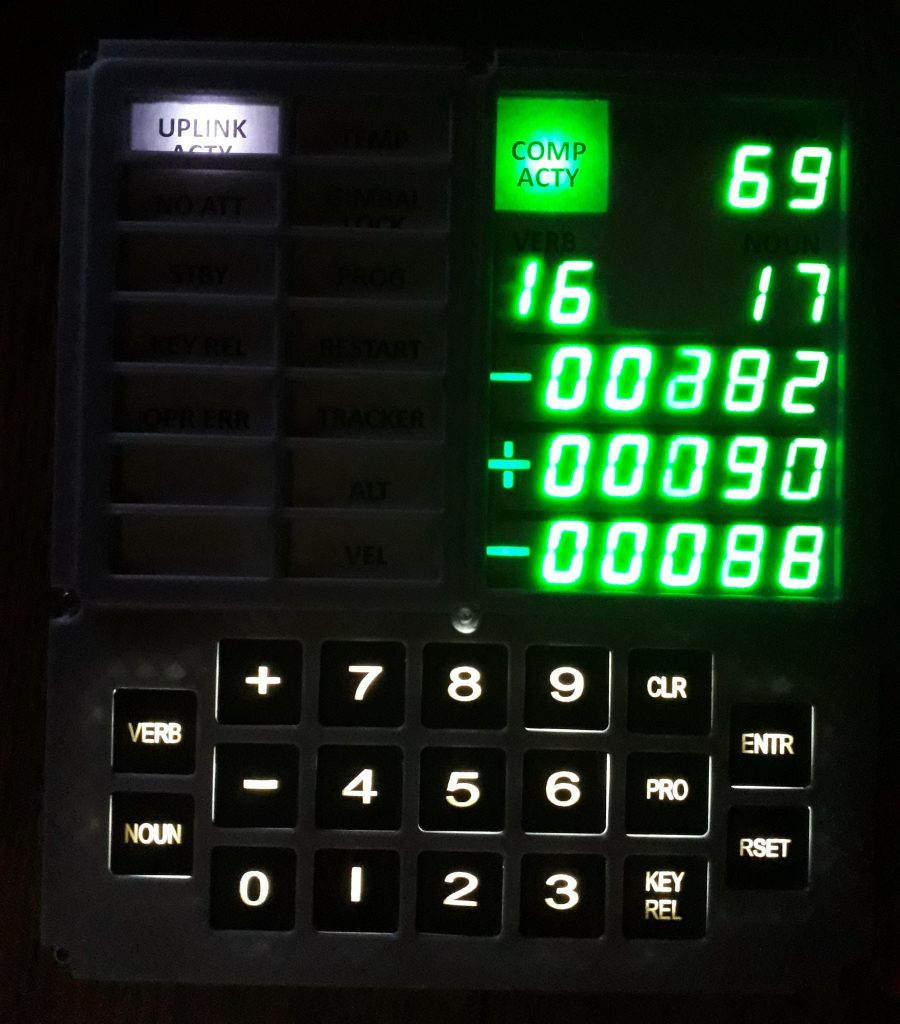
Then, just for completeness sake (well, and for fun, too), I selected VERB 16 NOUN 17 to display some acceleration data from the IMU. Works great, and the first Open DSKY unit is complete!
(Photo: Apollo Education Experience Project)


