
Caution and Warning Lights
At the top center of Panel 2 (the center panel) of the main control panel are two 4×6 matrices of indicator lights, known collectively as “Caution and Warning Lights” (or C&W lights). My original intent was to build them with standard LEDs and have them illuminate all at once when the “Lamp Test” switches were activated. However, I recently discovered that the Open DSKY had the capability of extending power and control lines out from the circuit board. Then I thought it would be interesting to see if I could make the Open DSKY control the C&W lights.
The Open DSKY uses NeoPixel LEDs for the various indicator lights on the left. While the control line could be extended, surface-mount LEDs aren’t easily prototyped, so I went with APA-106 LEDs instead. These have a standard 5mm LED shape but four leads instead of two – V+, ground, data in, and data out. I made a test circuit with 6 of the APA-106s on a prototboard for initial testing with the Open DSKY.
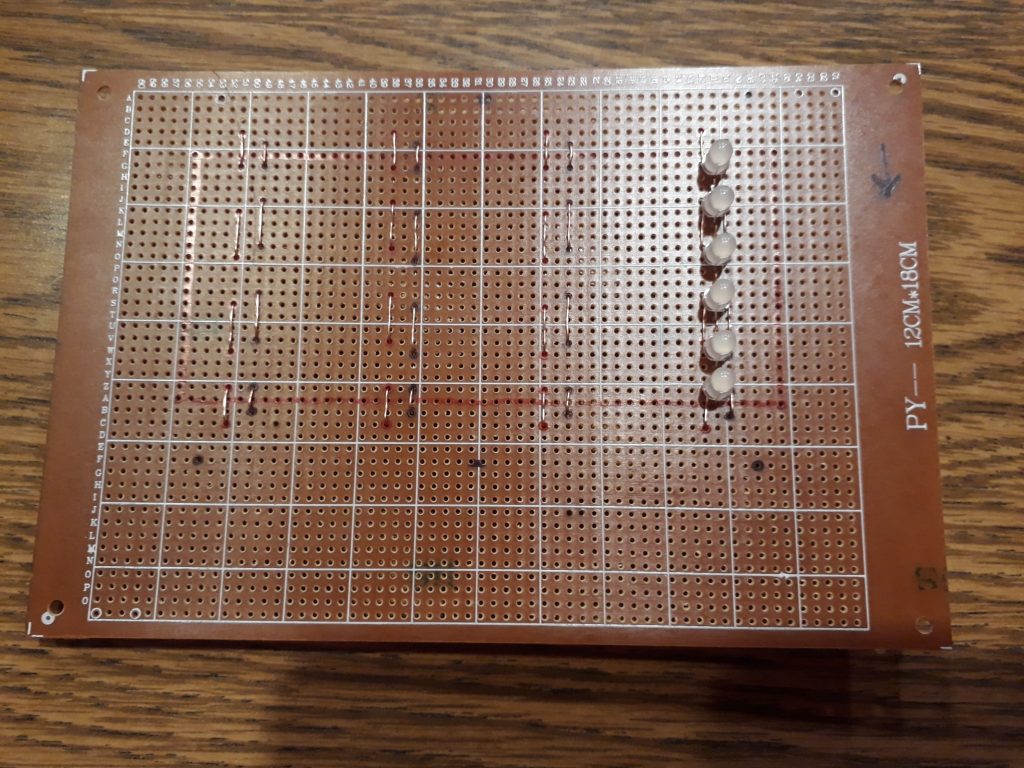
(Photo: The Apollo Education Experience Project)
To bring the control line out, I tack-soldered a wire to the Data Out pin of the last NeoPixel in the Open DSKY. I also soldered a header onto the other extendable lines, then created a 3-wire jumper that connected the V+ and ground from the header and the Data Out line to a connector, which I connected to the test circuit.
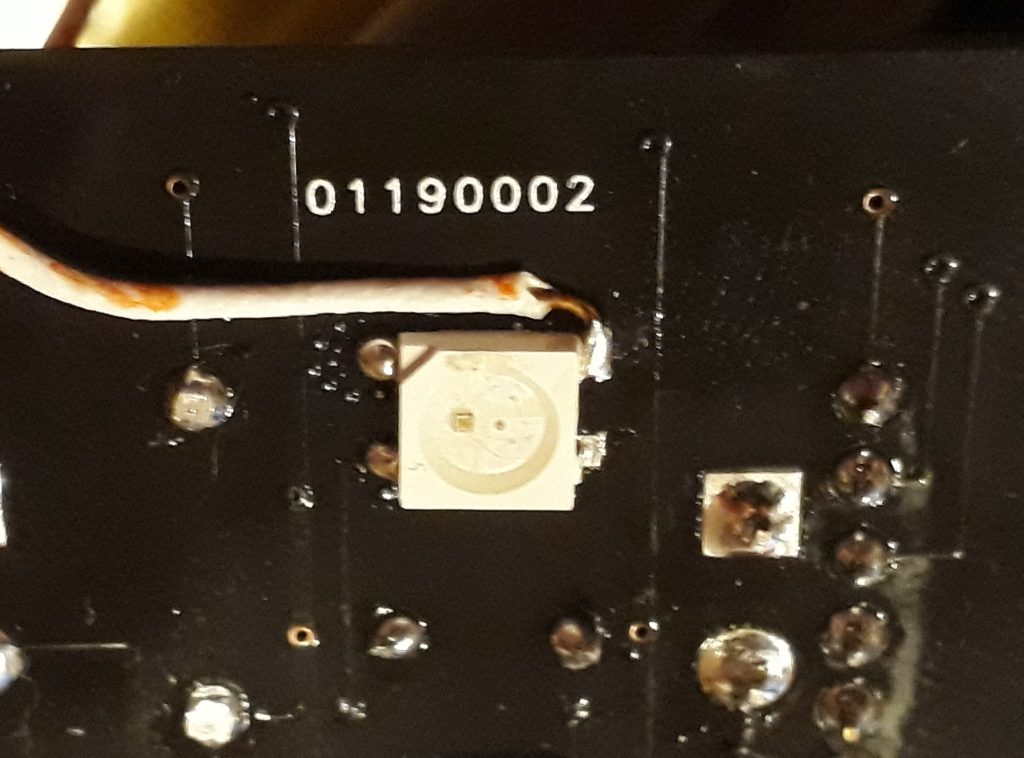
(Photo: The Apollo Education Experience Project)
I programmed the Open DSKY so that it would recognize the additional LEDs and wrote a simple random color generator. The result worked great!
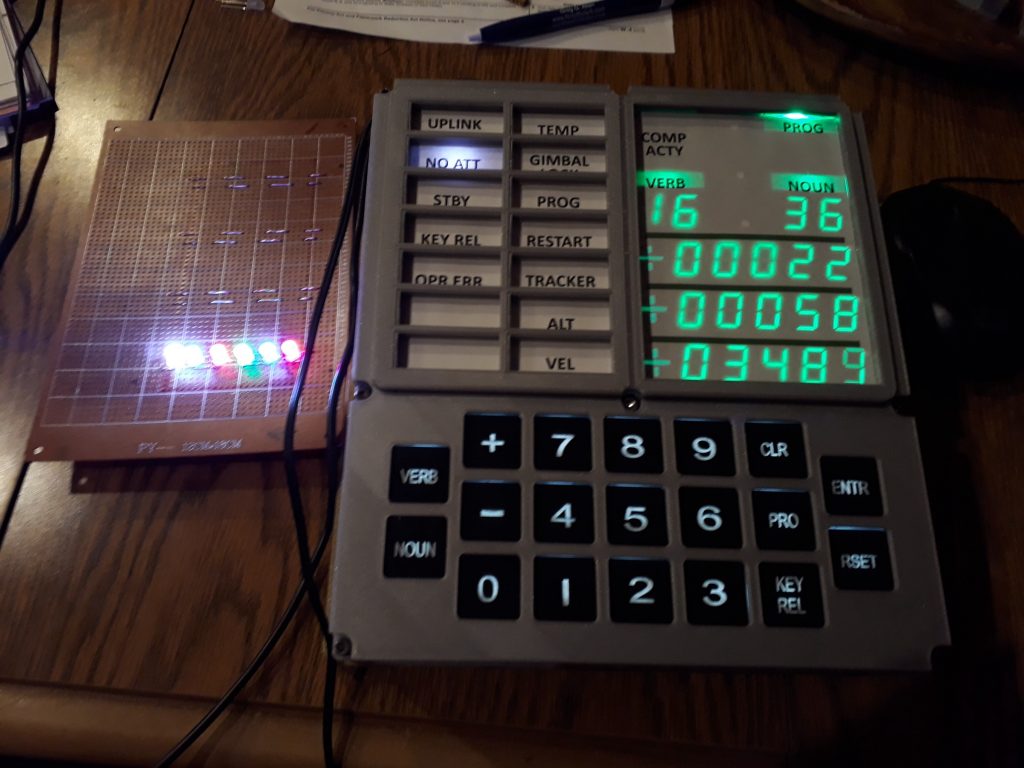
(Photo: The Apollo Education Experience Project)
Once I knew the circuit was going to work, I finished out the circuit by adding the remaining 18 APA-106 LEDs. On the back side, I soldered a 90-degree header and brought the V+, ground, data in, and data out lines to it so connection can be made more easily.
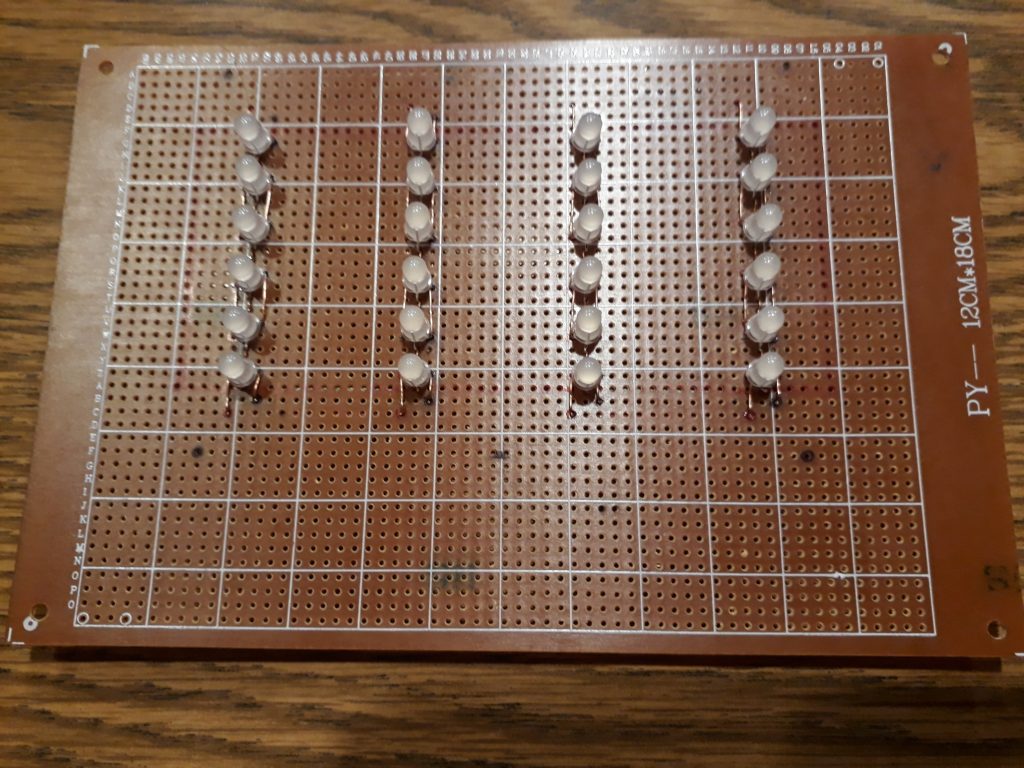
(Photo: The Apollo Education Experience Project)
I then designed a housing for the C&W lights to match the original. The original C&W lights were all individual units plugged into two frames, but I designed these as two single units of 4×6 lights each. The outer portion consists of a shell with screw mounts and a top face that looks like 24 separate lights superglued to the shell. The inner portion is divided into 24 cells that work as light dams, and will insert into the outer shell.
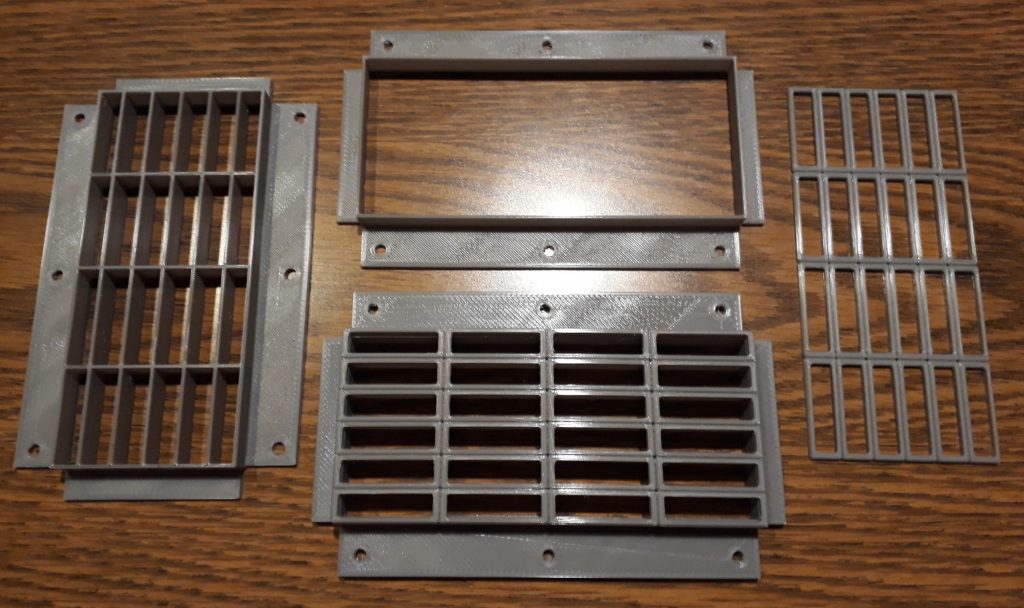
(Photo: The Apollo Education Experience Project)
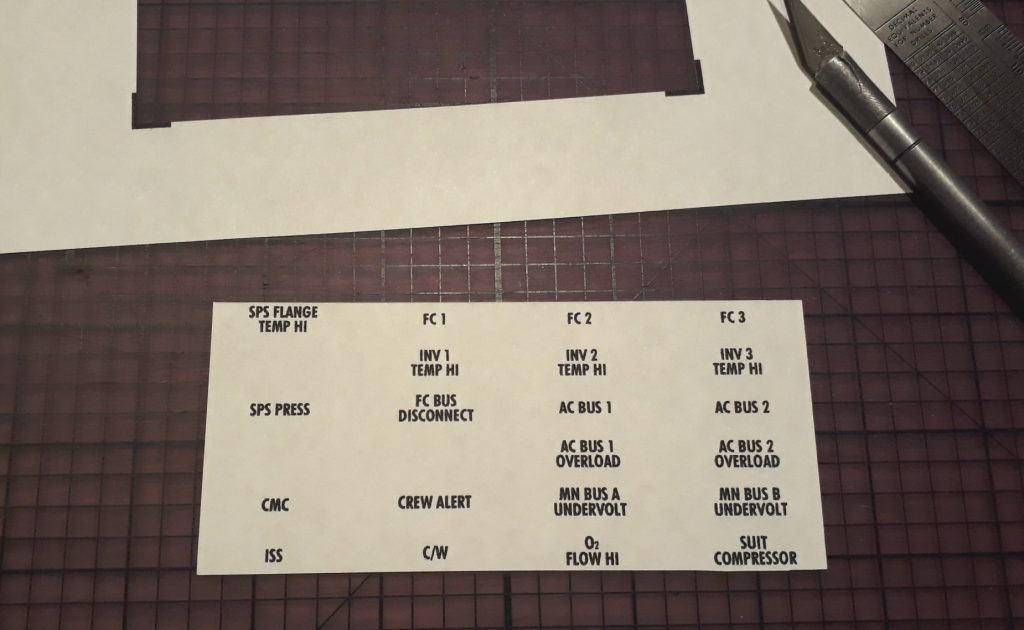
When inserted into the outer shell, the inner piece will trap a transparent window and a paper insert with the legends for the various C&W lights in that bank. I designed the insert in Photoshop using the Futura Condensed font, printed an insert on ordinary 20# paper, and cut it and the transparency to size.
(Photo: The Apollo Education Experience Project)
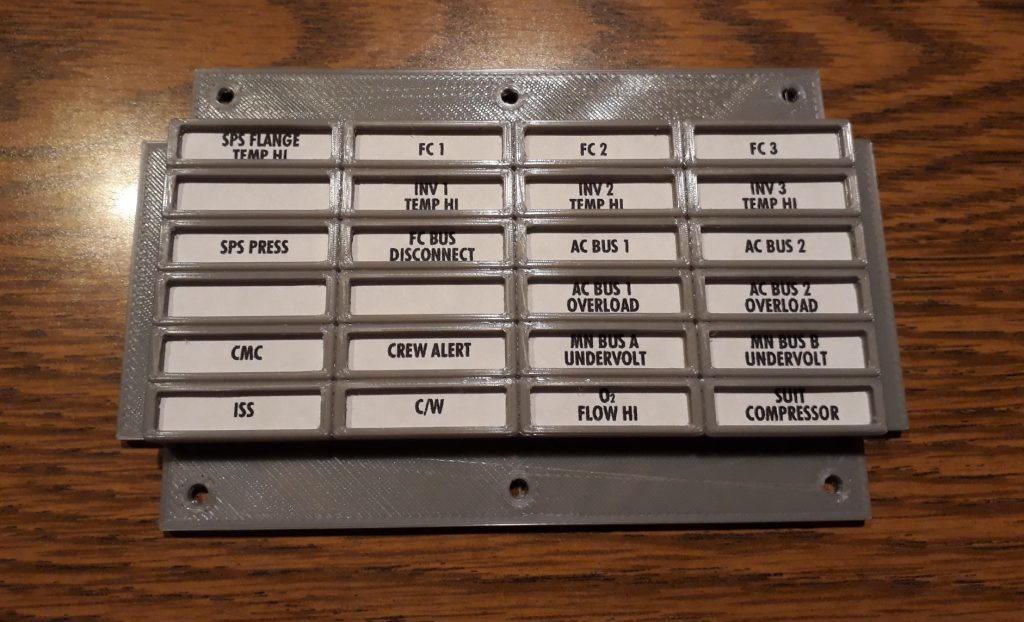
I assembled the 3D printed pieces and the inserts, and discovered how close the tolerances needed to be on something so small. I took a few careful measurements, adjusted the Photoshop template, and reprinted the insert. Much better! Now I had one complete unit.
(Photo: The Apollo Education Experience Project)
Now to make them work. I reprogrammed the Open DSKY to basically perform a lamp test with the 24 new LEDs. I recalled that some of the lights were yellow while others were red, but instead of looking up the correct arrangement just for testing, I made the top 16 yellow and the bottom 8 red. Looks good so far.
(Photo: The Apollo Education Experience Project)
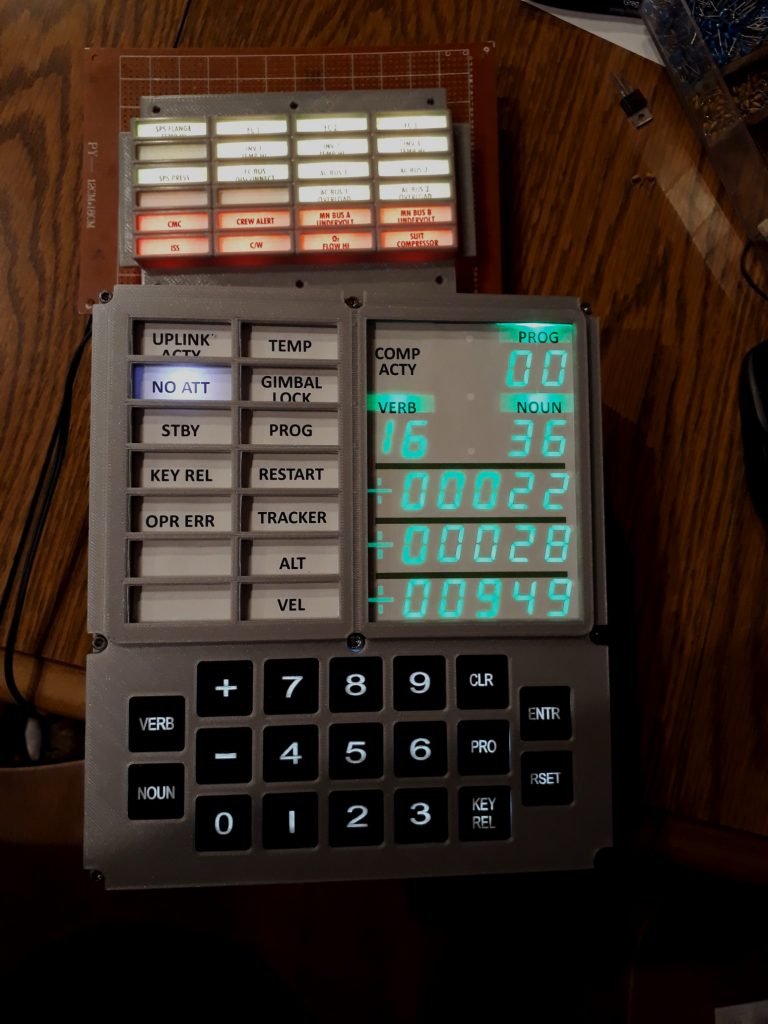
Now that I had one of the C&W panels working, I couldn’t help but want to try it out as it might appear in action. So I programmed the Open DSKY to illuminate the lights as they might have appeared on Apollo 13 when the accident occurred, including “Main Bus B Undervolt”. Pretty striking appearance!
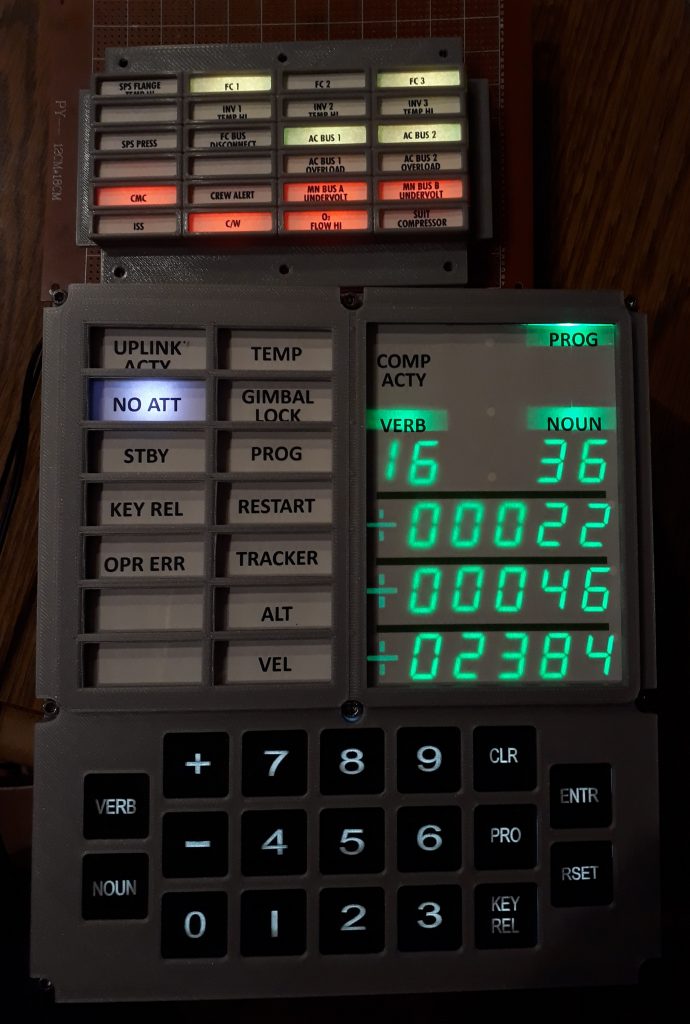
(Photo: The Apollo Education Experience Project)


Who made the 3D printing of the Caution and Warning Lights assembly and is there any way to get in touch with this person?
Hi, Charles – I designed and printed the Caution and Warning Lights assembly myself. It’s not in a form that is ready to distribute, but it is on the list of items that I plan to redesign and have produced for sale once the Project is complete.